View allAll Photos Tagged notes
the frame is a slightly modified IKEA MIKAEL computer table with the keyboard tray lowered to fit stacked items and allow for ventilation.
Note that every comment on this picture will result in at least one comment on a picture from your photostream!
Monica love getting wet in her latex as shes the best swimmer in Shiny-high, shes got many latex outfits she goes swimming in.
Just a note to fans :3 In real life I do have a sub named Monica and This Ai photo hhere looks just like her as in her face, hair and body plus she loves wear black latex catsuits.
More info on Monica
Name: Monica Raven
Hight: 5,7
Age: 16
Hair color: Black
Eye color: Brown
School: Shiny high
Best friend: Moniree
Her dominatrix: Moniree
Favourite color: Black and red
Sexually: bisexual
Personality: Sassy and naughty
Favourite fashion: Sexy shiny latex clothing with catsuits
Hobbies: Swimming, tennis and dancing,
Lives: in a mansion
Obsessions: shiny things and her dominatrix Moniree
More latex land links below.
Deviantart - Latex land art
Deviantart - Latex Ai art
Flickr Latex Ai art
Beings of latex land Rubber-ranks
Rubber-rank 1 Latex furrys
Rubber-rank 1 Latex land dolls
Rubber-rank 2 Latex land dolls
Rubber-rank 3 Latex land princesses
Rubber-rank 4 Latex land queen's
Rubber-rank 5 Latex land goddess
A closer look at the fish farm. Note the scarecrow there! Yes, that thing that looks like a hanged man is actually a scarecrow. At least that's what I think. Unless it's some form of a counter weight or something. (Prek Toal Bird Sanctuary, Siem Reap, Cambodia, Apr. 2014)
Vodja projekta v agenciji: Nina Gabrijelčič
Kreativni direktor: Samo Geršak
Tekstopiska: Vlasta Merc
Art direktor: Jure Sotler
Oblikovalec: Ljubo Bratina
Il Roskilde Festival nasce nel 1971, uno fra i più importanti festival musicali d’Europa. Si svolge ogni anno a Roskilde, città della Danimarca da cui prende il nome.
Sui suoi 7 palchi viene privilegiata la musica indipendente ma anche il jazz, l’elettronica, la world-music … Il festival presenta anche attività collaterali come cinema, performance-art, poetry slam, ed altro ancora.
Ecco la line up 2011
15.09.2015 _ Paroisse Saint-Eustache (Les Halles), Paris, France _ Pentax K-x, SMC Pentax-DAL 1:3.5-5.6 18-55mm AL
The oringinal Title of this picture is "note 6" The reason I point that out is the fact that this is only one of seven (1/7) this is only one-seventh of the notes that I have about dragons and other mistical things this is my favorite of them. if you would like to see more of them just comment "I would like to see them all" (IT may vary)...
A page of my (scribbly) notes from a little something we've been working on. It deals with Neopets, Neopoints, and items, as you can clearly see.
Edit: This was just before I switched to using my iPad for notes, which helps me keep my thoughts way more organised because I can edit the page and move things around without rewriting the whole thing. Hooray!
Need to take a note while on the phone but can never find a notepad handy? Well, have one in easy reach on your fridge with this cute little retro phone notepad!
Check out full tutorial information in my profile!
Zircon showing strong IR fluorescence, particularly with 404nm laser excitation (blue line with SAME ZERO LEVEL as the other spectra). The green line shows the transmission spectrum through a 4-5mm thickness of stone (stone is 11mm long). Note the doubling of internal features due to pronounced birefringence.
The greyscale insert is a photograph (Sony DSC F-717, RG780) of the infrared fluorescence under defocussed 404nm laser excitation. The image passband corresponds roughly to the width and position of the image on the spectrum.
Painting Below Zero: Notes on a Life in Art
Tue, Dec 1, 2009, 6:30 pm
Sackler Center for Arts Education
Solomon R. Guggenheim Museum
5th Ave at 89th St, New York City
Photos: Enid Alvarez
On the occasion of the publication of James Rosenquist's memoir, Solomon R. Guggenheim Foundation and Museum Director Richard Armstrong and writer/scholar Judith Goldman engaged in a conversation with the iconic Pop art painter on his life story in his own words. The evening provided a unique look inside the contemporary art world and the creation of the artistic language of one of the twentieth century's most important artists. Co-organized by Alfred A. Knopf.
On view:
Paired, Gold: Felix Gonzalez-Torres and Roni Horn
Gabriele Münter and Vasily Kandinsky, 1902–14: A Life in Photographs
134/365
A mean young woman put this note on my car when my bumper was about 11 inches in front of her spacious driveway. The cops came, but let me go (obviously annoyed with her.) I laughed (and crumbled the note in anger.)
"I'd tell all my friends but they'd never believe me,
They'd think that I'd finally lost it completely.
I'd show them the stars and the meaning of life.
They'd shut me away.
But I'd be alright, alright,
I'd be alright,
I'm alright.
I'm just uptight, uptight."
- Radiohead
Notes sketched in my Moleskine pocket sketchbook, in a typographic/graphic format of a message given at Meadowbrook Church by Tom Slye, April 7, 2007.
p, td { line-height: 1.3; }
p { padding-bottom: 1em; }
a { color: #3697b3; font-weight: bold; text-decoration: none; }
a:hover { color: #000; text-decoration: underline; }
a:active { color: #000; text-decoration: underline; }
From Evernote:
Screenshot
Clipped from: feedproxy.google.com/~r/TheNiftyFifties/~3/HSNQzJqLYSs/38...
Screenshot
Screenshot
Marilyn Monroe
Screenshot
bohemea:Brad Pitt & Angelina JolieGod I love the way they...
Source URL: fuckyeahangelina.tumblr.com/post/38730651344
Screenshot
Julianne Moore Wearing Black Feather Circle Scarf
Source URL: love-it-or-hate-it.fabsugar.com/Julianne-Moore-Wearing-Bl...
FASHR11
Barbie silkstone design sketches by Robert Best
Source URL: vintagegal.tumblr.com/post/38242496709
Screenshot
Screenshot
Screenshot
Untitled Clipped Note
6
p, td { line-height: 1.3; }
p { padding-bottom: 1em; }
a { color: #3697b3; font-weight: bold; text-decoration: none; }
a:hover { color: #000; text-decoration: underline; }
a:active { color: #000; text-decoration: underline; }
From Evernote:
Monica Vitti
Clipped from: feedproxy.google.com/~r/tumblr/ieVm/~3/KxkYLa_MMJA/386186...
Fashion photography by Patrick Hunt for Vogue UK, June 1969.
Source URL: theswinginsixties.tumblr.com/post/38634749058
Janet Pilgrim - Playboy’s Miss December 1955
Source URL: vintagegal.tumblr.com/post/38765525397
Screenshot
Untitled Clipped Note
Untitled Clipped Note
Untitled Clipped Note
water19.jpg (JPEG Image, 800x340 pixels)
dita-vin-teese-martini
Source URL: 2.bp.blogspot.com/-BaICqEjBlrk/TbvHVD5TMsI/AAAAAAAAABc/Yu...
dita-von-teese-martini-glass--large-msg-129047555793
Source URL: cdn.buzznet.com/assets/users16/yasfx/default/dita-von-tee...
Untitled Clipped Note
Screenshot
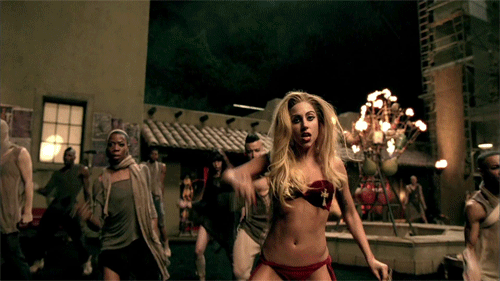
Lady-Gaga-Judas-lady-gaga-21762400-500-281
Source URL: images4.fanpop.com/image/photos/21700000/Lady-Gaga-Judas-...
Untitled Clipped Note
Screenshot