View allAll Photos Tagged image_manipulation,
Not a multiple image or image manipulation but a shot of an outdoor artwork mixing a fountain with a flame.
...taking the long journey through roiling waters.
My special dedication to Magda & Dan at the beginning of their journey, in calm and beautiful waters.
St Mark's Square, Venice, as seen from the tower (Campanile). Circled the square.
This is the output photo for a 'Tiny Planets' experiment (ipad photo spiral tool), made from the photo 'St Mark's Square, Venice.' (Also uploaded)
Hope you like it - it's an odd image manipulation, easy to use and yet more difficult to explain...
There was also about 5-7 more out of shot.
.
.
To view this picture large just press L on your keyboard.
.
**** Disclaimer ****
.
I love long exposures, everything to do with night time, the dark, sunrise and sunset.
I like to take pictures mainly at night , sometimes during the day and in dull and fading light and I will sometimes display the time and date the picture was taken too.
I tend to take pictures of Light trails, Motorway traffic, Street lights, Buildings, Landscapes, Bokeh, Night bokeh and Hexagonal Night Bokeh in and around the North East of England.
All of my pictures are 100% natural and untouched in every way without ever been Photo shopped or altered or messed about with in anyway whatsoever, No multi layered photography, No HDR's and No image manipulation of any kind, all of my pictures look just the way they did when I saw them at the time of taking and I'm VERY PROUD of that.
I don't do any photo processing at all, I don't even own any photo software.
All of my starbursts are all 100% natural without using any filters or anything else, as is all my bokeh, night bokeh and hexagonal night bokeh, its all natural, no funny gimmicks at all.
I don't do anything with my pictures apart from take them and then upload them , 99.99999% of my pictures don't even get cropped , they are all 100% natural and untouched and then uploaded.
All of my pictures are copy right, © All rights reserved, you MAY NOT use any of my pictures without my written consent, you also MAY NOT change, alter, adjust or rearrange my pictures in anyway what so ever.
.
.
© All rights reserved.
Blog I Drawings I Website I Facebook
Part of an ongoing experiment with image manipulation: The images are the result of a 2 stage process. First, a photo is taken of a moving subject. What results is a blurred image, the distortion magnified by the grain and contrast achieved by overdevelopment of the film in the darkroom. Already the face or body has been transformed by the simple act of movement. Then in the second stage, the photo is printed. Sometimes thick glossy varnish is applied across the whole surface of the image, or alternatively, the photo is simply printed onto glossy paper. This is when more magic happens. Shining light directly onto the surface of the paper, the image is transformed again. This time the transforming agent is light. The surface of the photograph interacts with what is contained within the image. A final photo is taken.
uscita fotografica del gruppo Rifredi Immagine - auto d'epoca e modelle - Piteglio
shooting session with Rifredi Immagine photoclub - old cars and models
location: Piteglio
17th May 2009
edited with GIMP -GNU Image Manipulation Program
www.messersmith.name/wordpress/2011/04/22/jazzing-up-your...
Once again, as you read this, I will likely have been stuffed into a long metal tube with a huge mob of other flesh and bone humans and am presently leaving a trail of noxious fumes across the frigid night sky between Honolulu and Phoenix. At Phoenix, I'll hustle from one winged meat wagon to another and arrive, hungry, tired and lonely in Indianapolis. I pray the ground will not be white. I'll be greeted by an old friend who will house and feed me for my time in Indy. My life today depends pretty much on the love of friends. That's a good thing. It keeps me going, sometimes even when I'd rather not go.
Faithful reader DogsDon'tPurr commented that she would like to see some step-by-step illustrations of how a digital image is processed in order to produce a more pleasing image, according to the likes of the photographer. I had to think that over for all of five minutes. I'm pretty much running out of material here in Honolulu, so I grabbed a couple of illustrative images from my camera and recorded intermediate steps in my processing so that I can show the steps which I take to prepare my images for presentation. If you feel yourself getting drowsy, switch to another channel.
I don't suggest that my method of working with images is any better than anyone else's. Each image maker needs to tailor a sequence which feels right. I used Photoshop for these images, but similar results can be achieved with any image manipulation program, providing it has tools sufficient for the task.
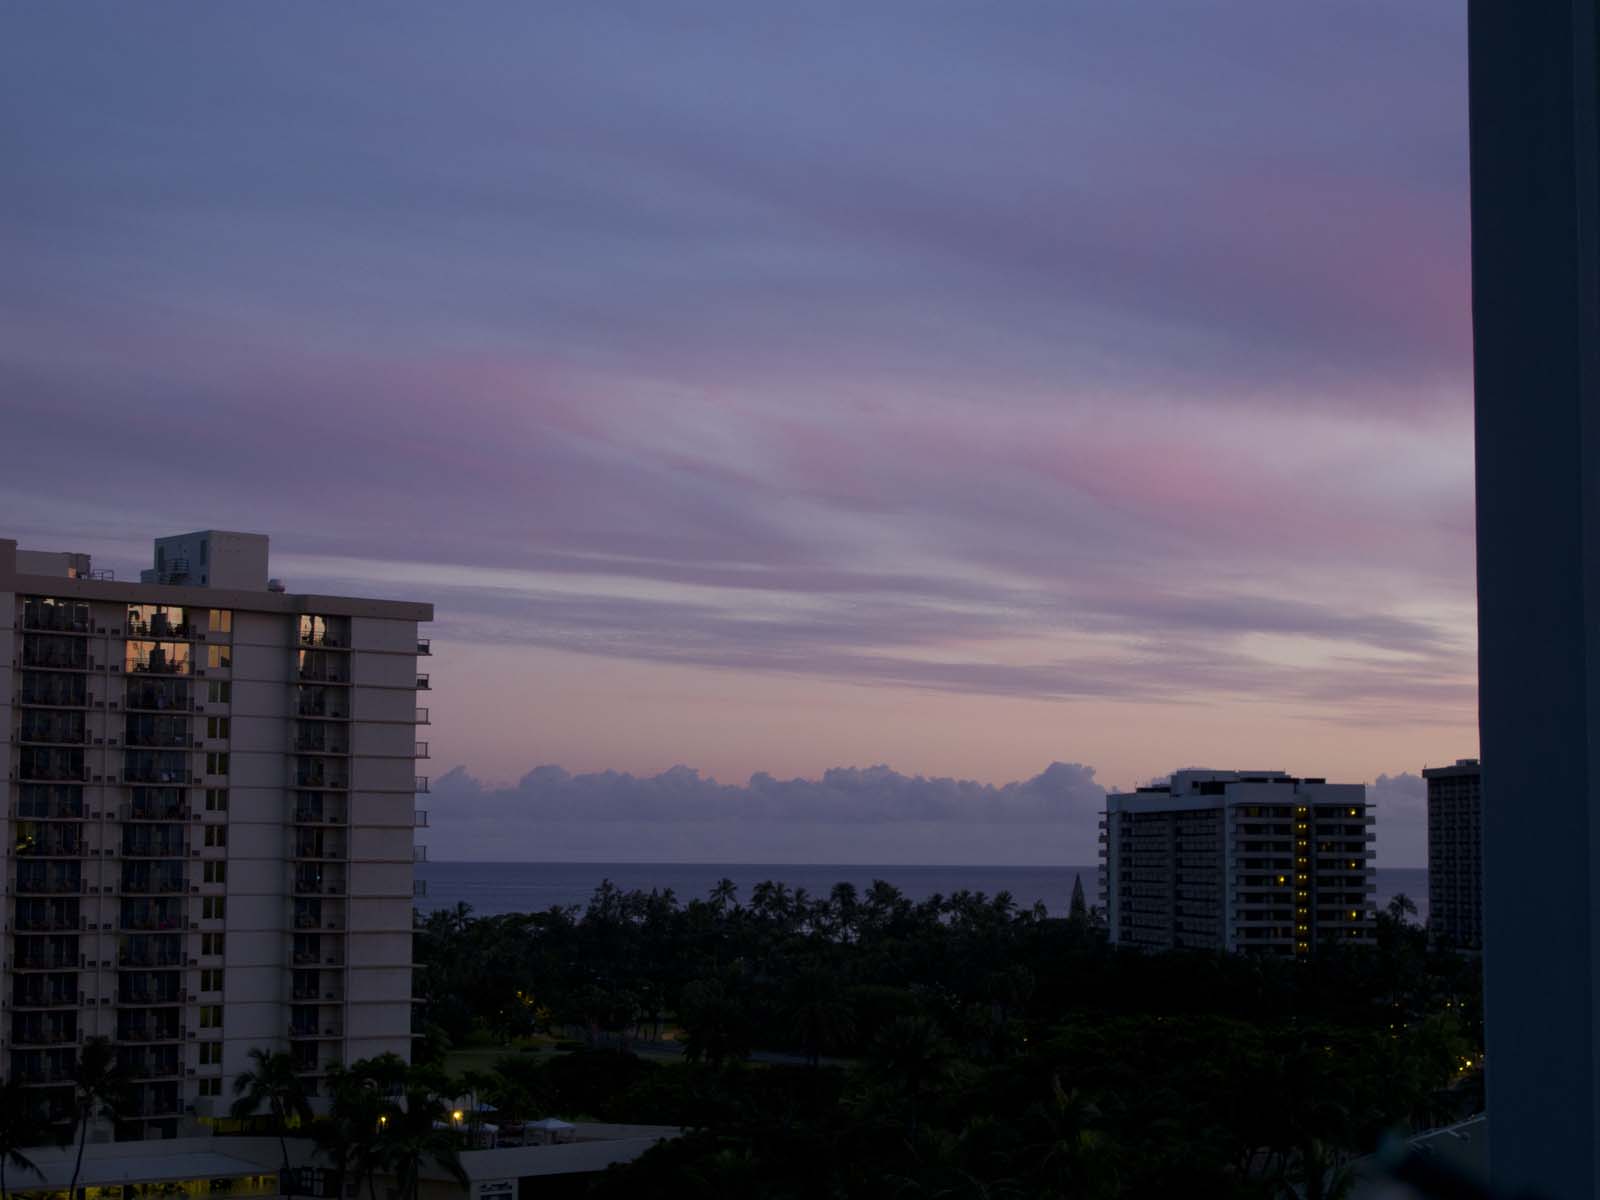
I chose the first image to make a point. The shot as it comes from the camera does not need to be perfect. That's why we have software to fix them. Practically nothing gets from my camera directly to these pages. I fiddle with every image until I'm happy with it. I took this yesterday evening at sunset from the apartment of a friend:
As it is, it's a throw-away. There are so many problems with it that I'd bore you to list them. In fact, it's so bad that I knew from experience that I would never end up with an image which looked "natural", so I had it in mind from the beginning to go for the "vintage postcard" look. With an image like this, that's what you'll end up with anyway, so it's best to just go with the flow.
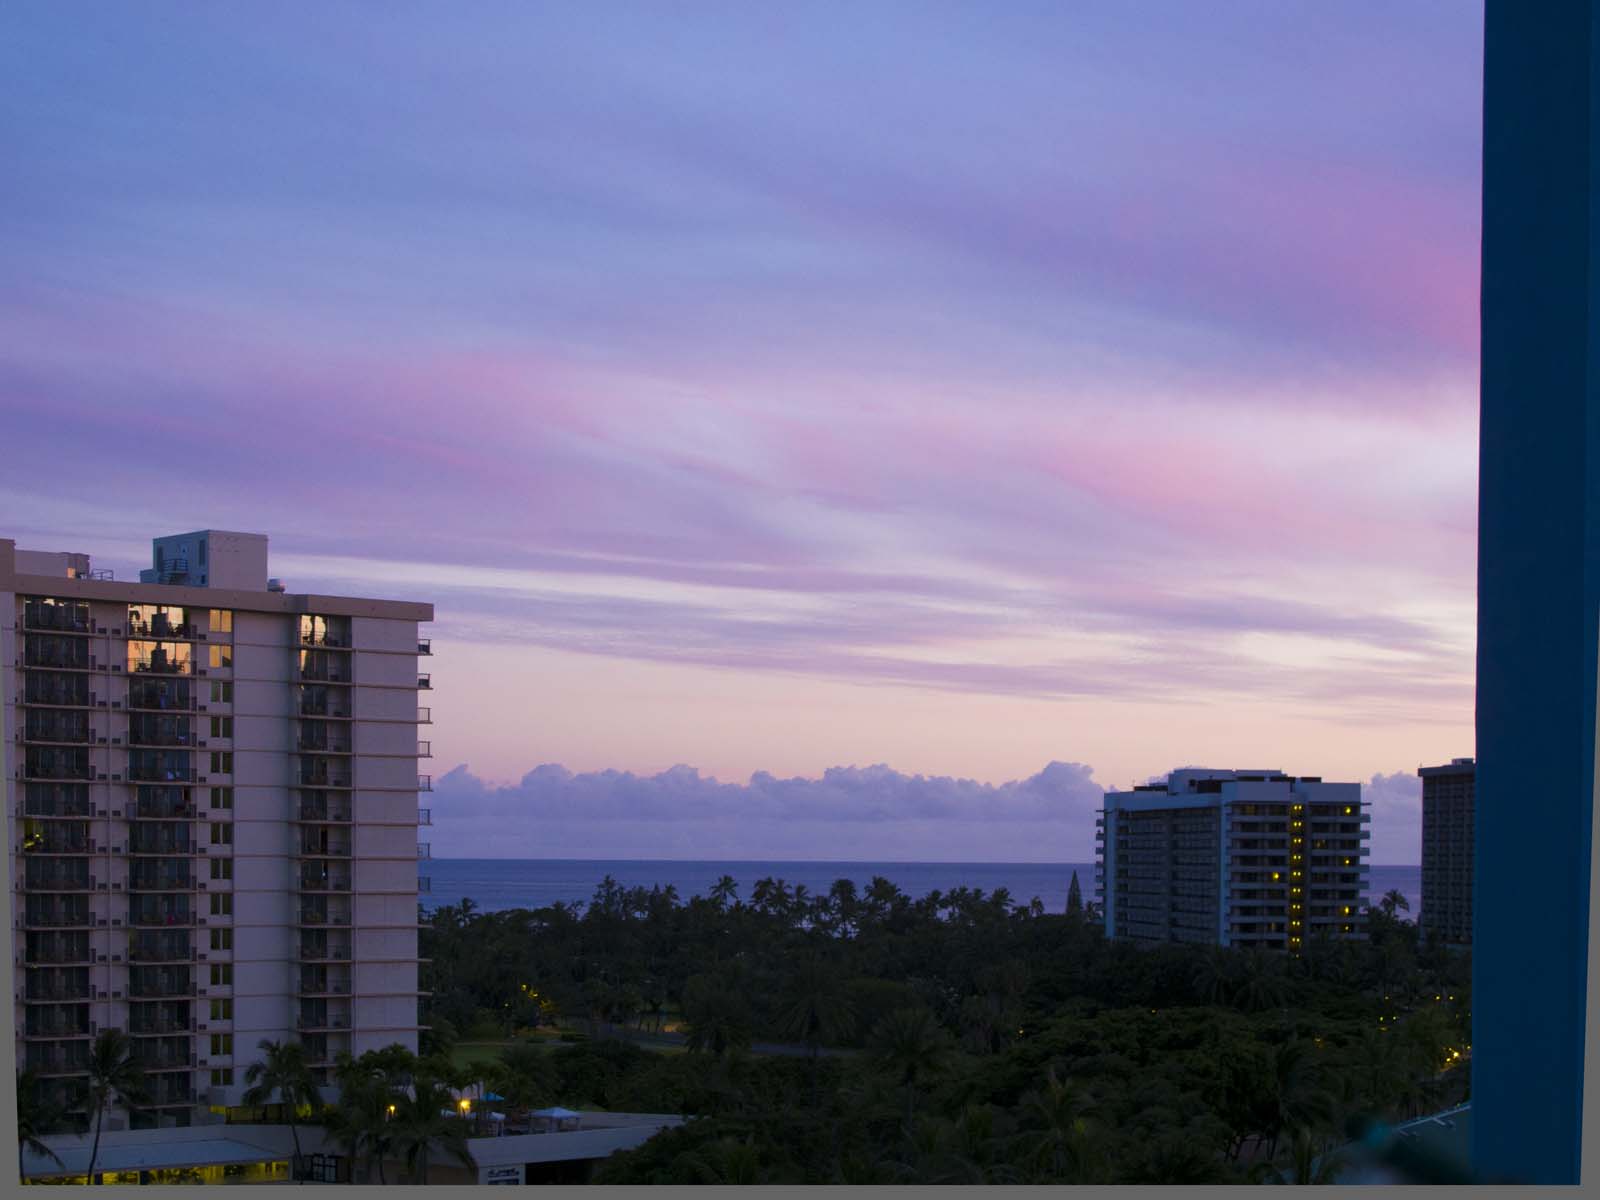
First I lightened it up a bit and straightened the buildings.
Next, I had to decide what portion of the image I really wanted in the finished product. I used a cropping tool to remove the obtrusive building to the right and a little of the building on the left along with some of the bottom of the shot:
Now that I look at it on the page, I wish I'd removed the small building on the right also. I could easily make it vanish, but I'll leave that for another time. What's left is what I want to show. That's cropping.
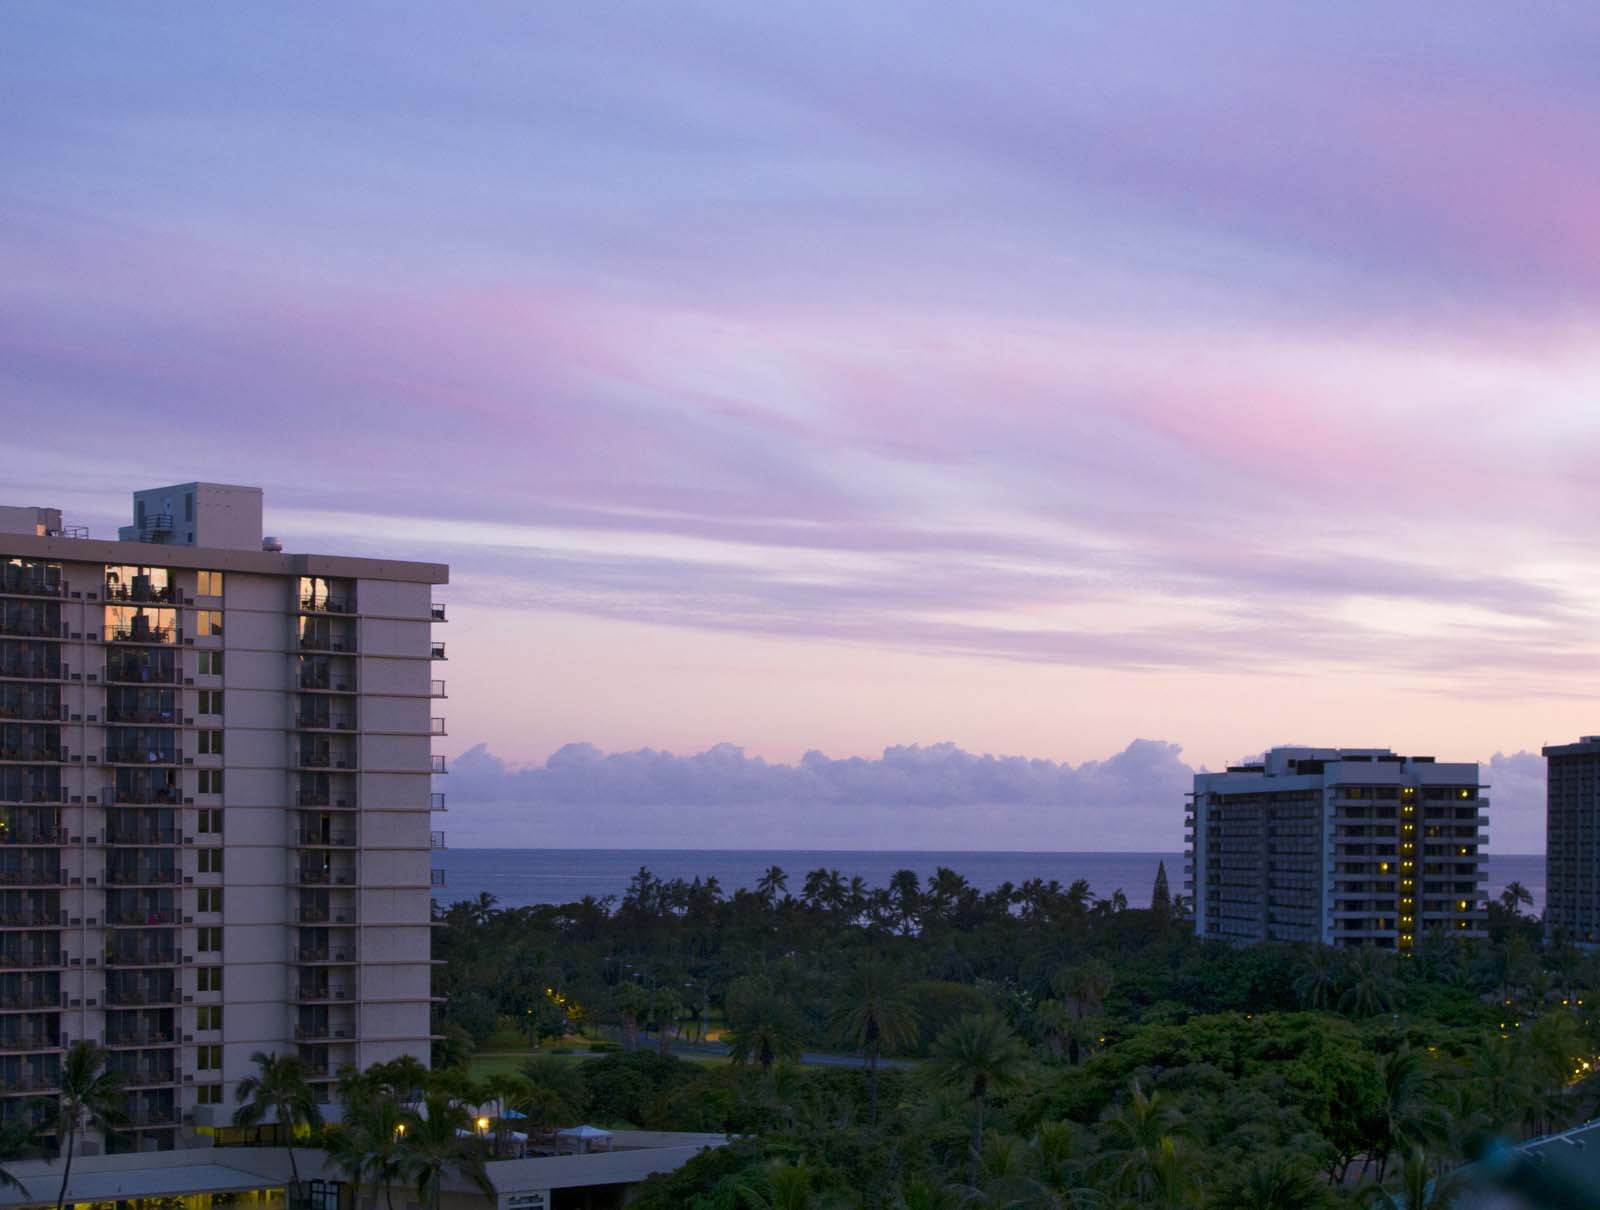
Then I lightened up the lower part of the image because all detail was buried in the shadows. Photoshop has a special tool for lightening up dark parts and darkening light parts in the same operation. I use it often for such images:
Now I can see some detail in the dark part at the bottom, but the colour is dismal.
So, I go to work on it with a tool that allows me to modify the hue of selected colours. I'm dealing mostly with green, so I need to take magenta out and add lots of cyan and yellow:
In the same operation I also took some cyan out of the red, which richend and warmed the sky a bit. The greens are now much brighter, but there is already an artificial look to the image, because I'm trying to create something from nothing. Now we're crossing over into interpretation. I'm making it up as I go.
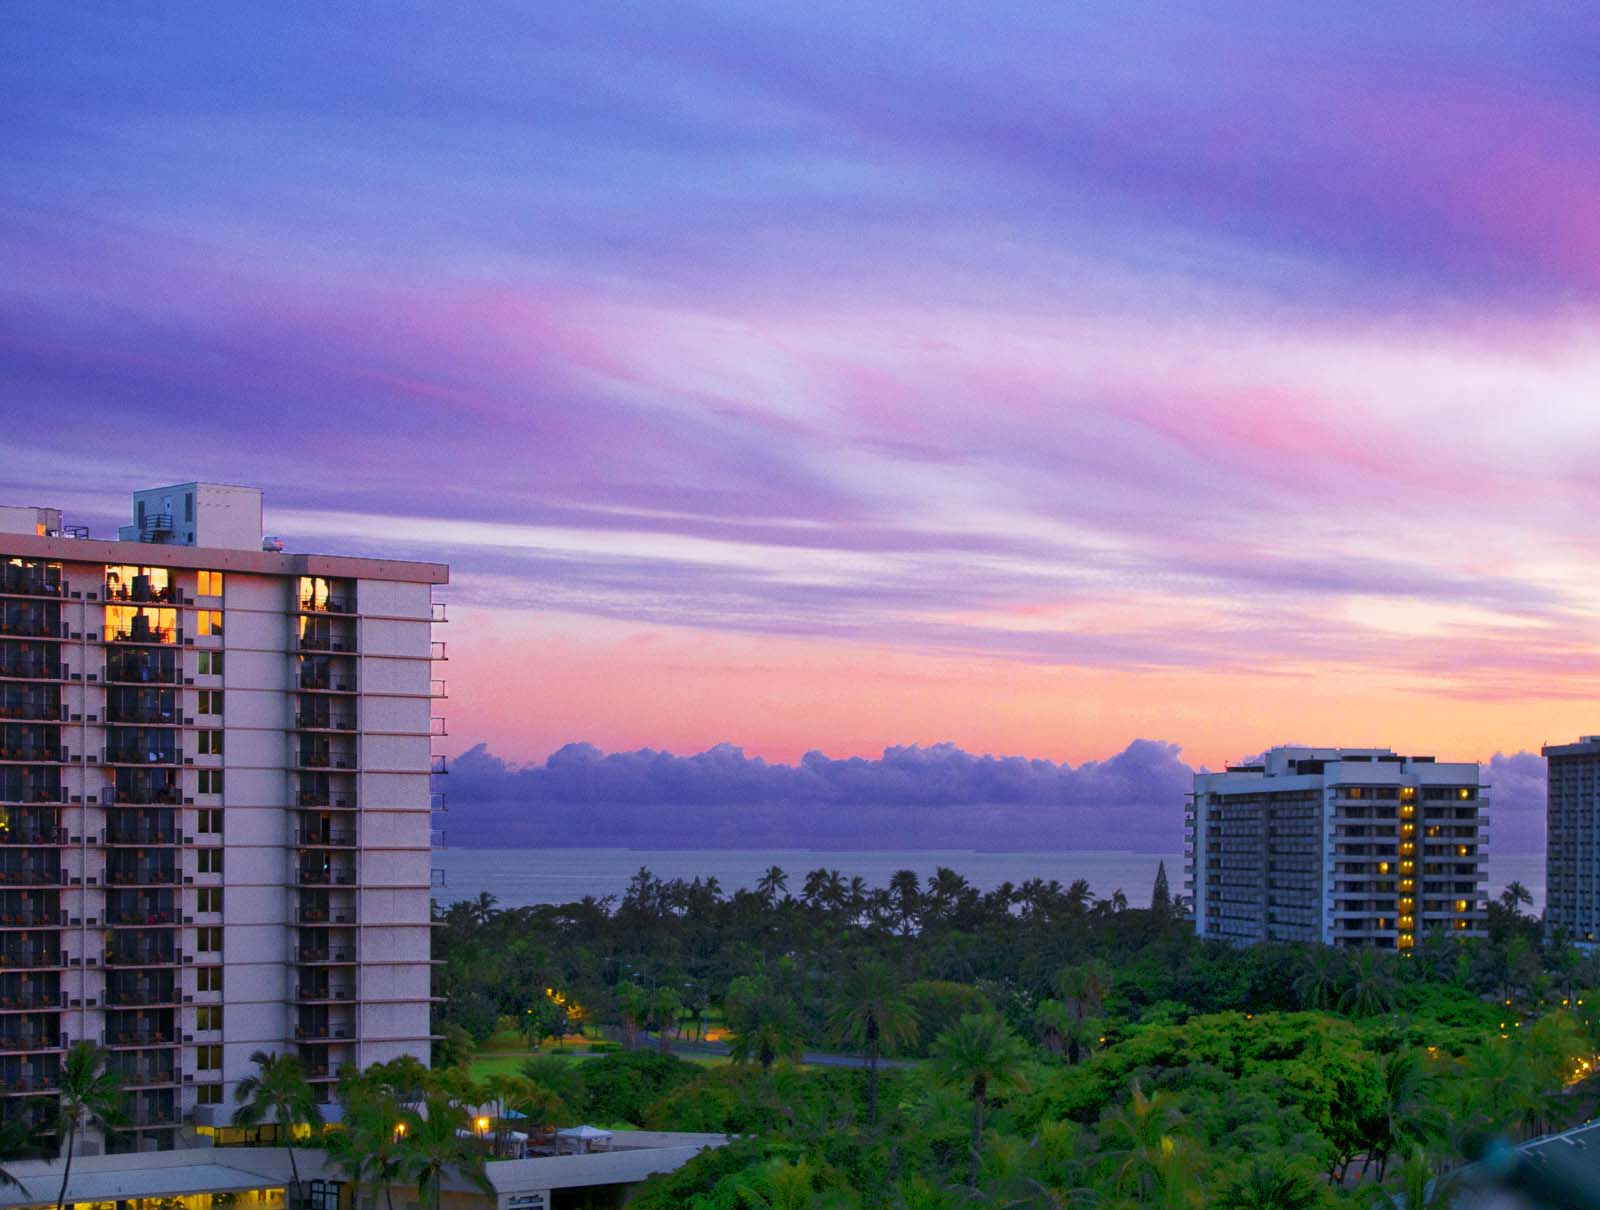
Next, I lightened the entire image. Then I used a special selection tool in Photoshop to select only the sky and I increased the saturation and contrast. This livened up the sky considerably:
I also lightened up the buildings and increased the contrast to give them some depth. In this step I had to fix each little balcony on the building on the left. Some of them had furniture on them. I removed it all. You may have to click to enlarge to see what I'm talking about. You may note that I brightened up the lights in the buildings.
After looking at the image for a while I decided I may as well go the final step in jazzing it up. I did not like the strong blue cast in the clouds on the horizon, so I desaturated them to make them grey, leaving just the tops bluish. I also selected the top third of the image and made a graduated edge on the selection (I "faded" it on the bottom edge). I darkened this area to make the sky more dramatic. It's an old movie trick:
There we have it. A "Vintage Postcard" shot from Honolulu. And, this proves the point:
Aloha.
For the next demo, I decided to use an example of an image which is not so shabby right out of the camera. You could print this water lily shot and put it in your photo album with reasonable pride. It's a "lucky" shot:
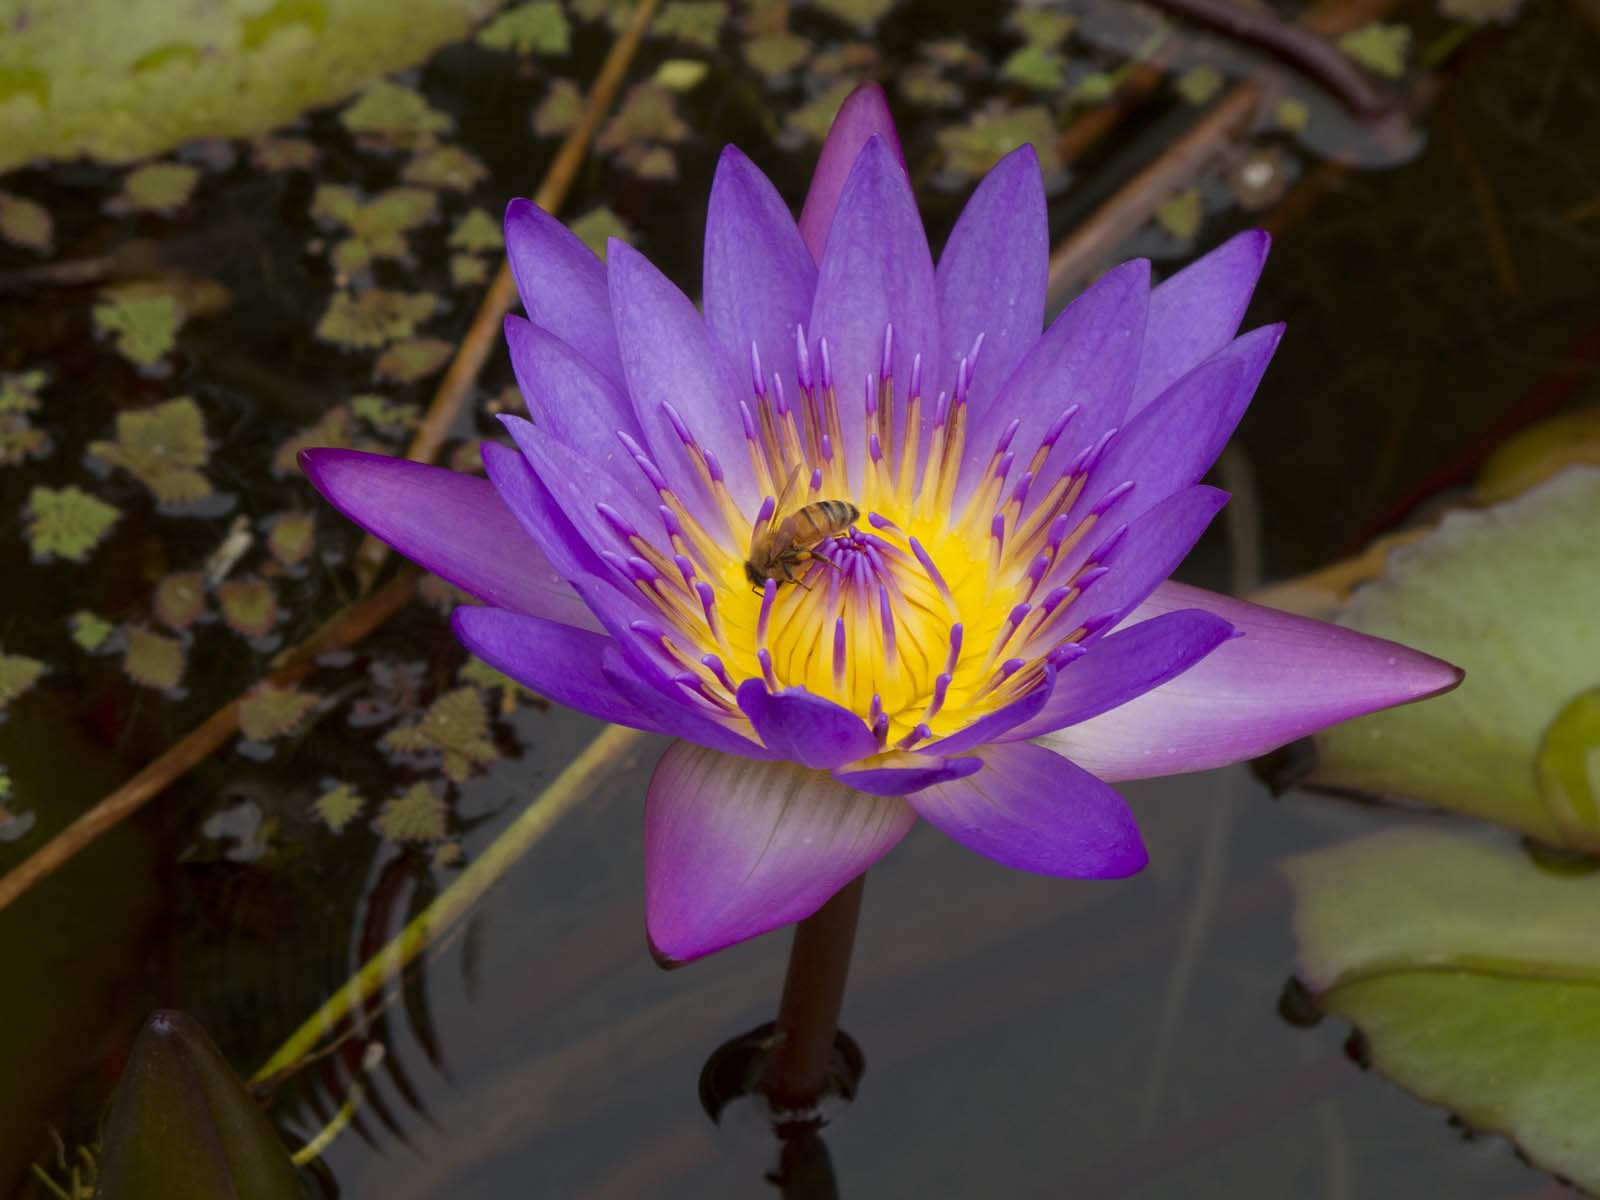
Ah, some, however, are never satisfied. I can see the possibilities, but it needs some work. This is a sister image to one I put on these pages a while ago. The bee is just facing the other way.
First, I brightened up the entire image and cropped it so that it conforms more to my sense of composition which is biased strongly towards the Rule of Thirds (if you don't know, you can use my search box):
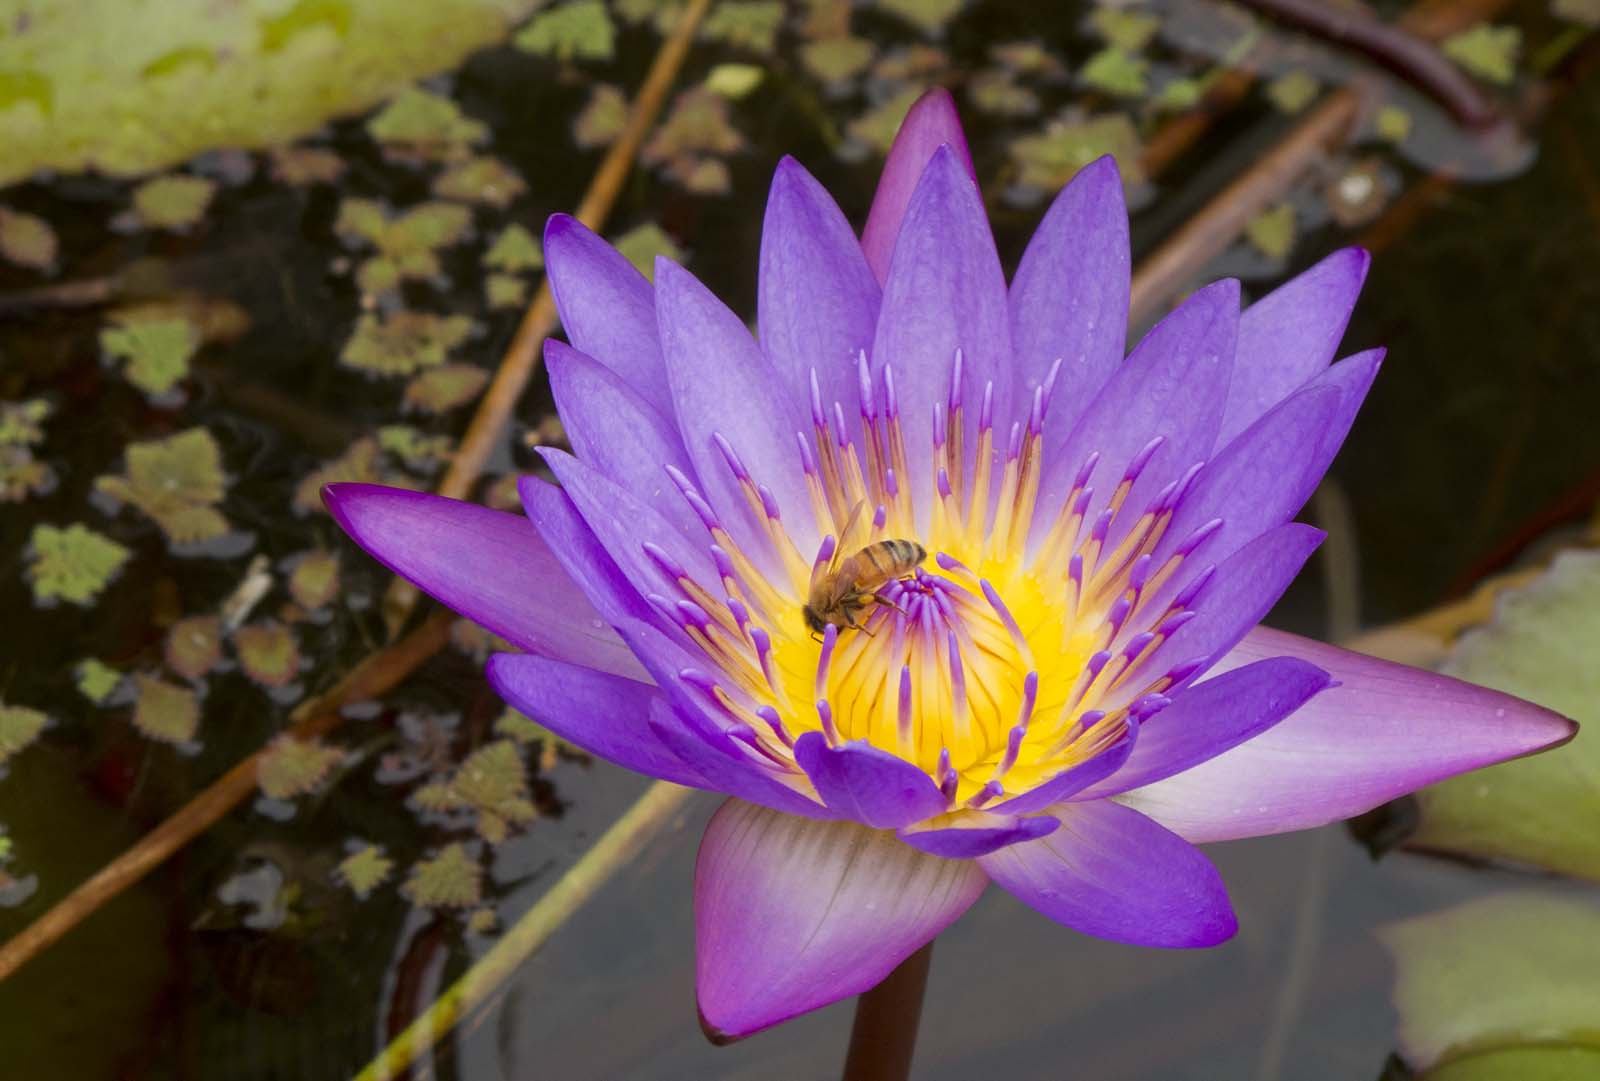
On my Canon G11 I tend to shoot images slightly underexposed as it seems to give me better saturation of the colours. Maybe I'm dreaming. It's just a feeling. I haven't done any side-by-side comparisons to prove it. While I'm rambling photographically, I'll mention that I'm going crazy trying to edit images on this five year old Toshiba notebook. The screen is horrible. The slightest change of angle changes the contrast drastically and the room lighting makes a dramatic difference. I know the quality of my images has suffered since I left my huge, high quality graphics monitor in Madang. It's an ancient Sony CRT terminal, but I love it.
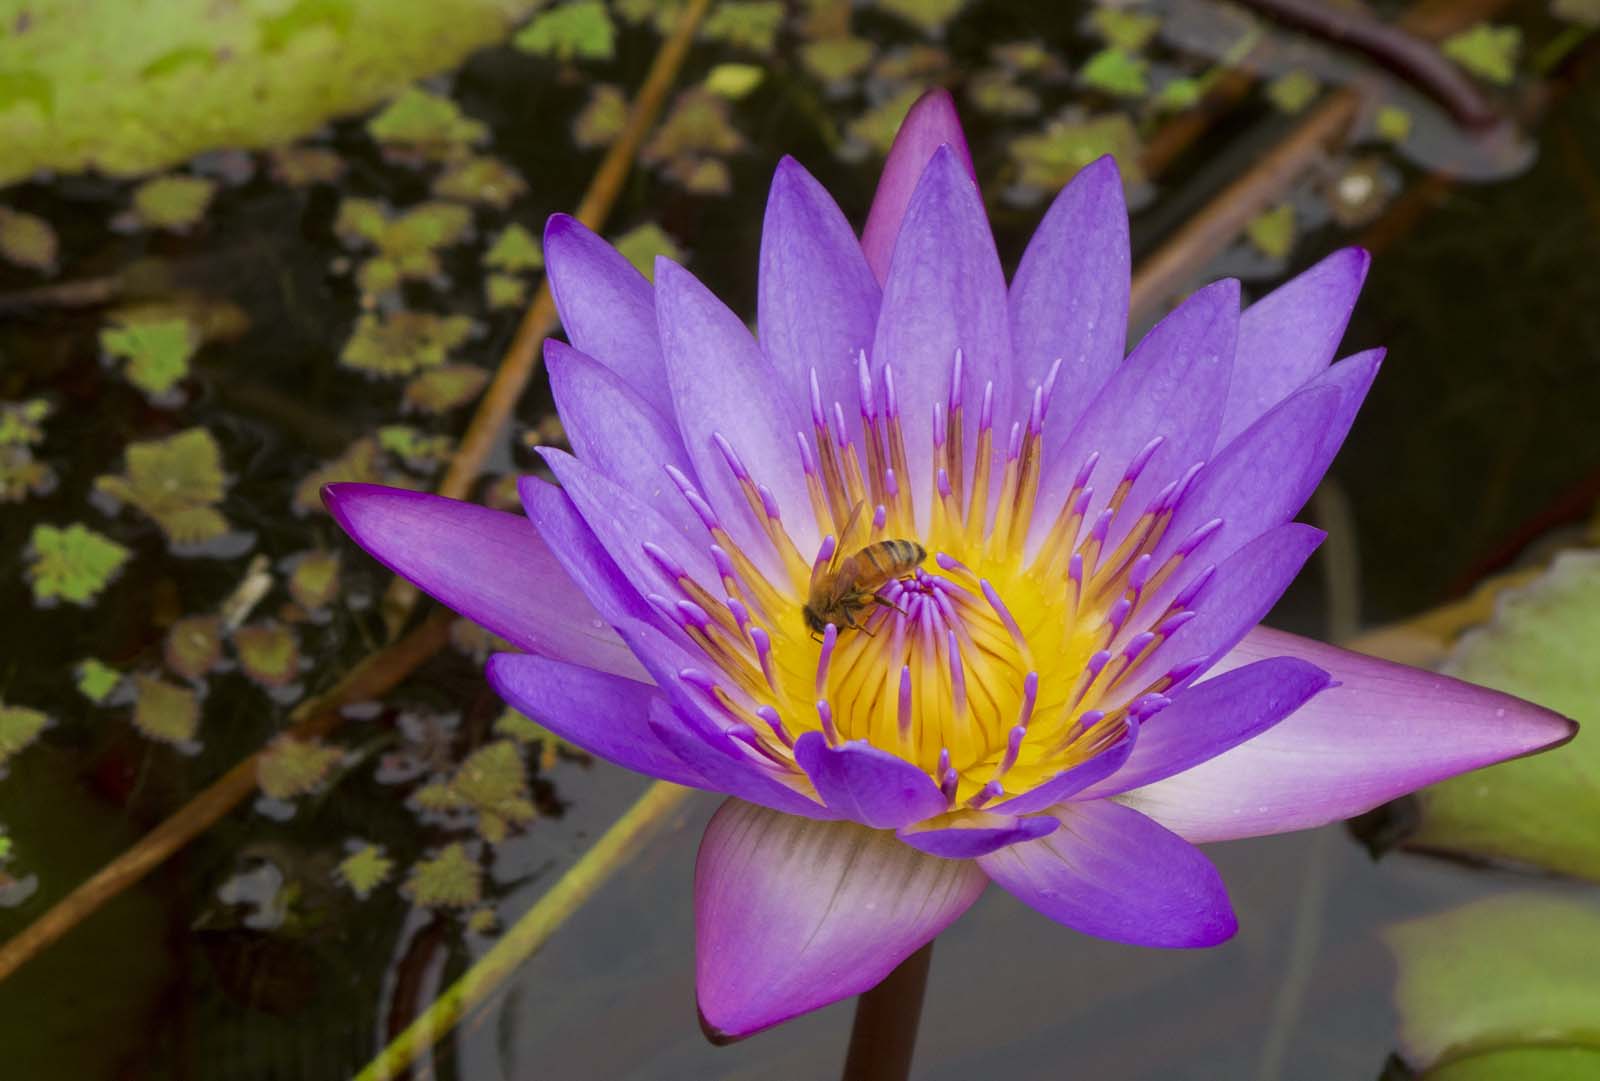
The difference in the next image is subtle. If you look at the centre of the blossom, it will appear less colourful than the image before. It may appear to be a step backward:
What I was doing was changing the balance of colours in the center to bring up some subtle shading which was barely discernable in the original. I'll fix the drabness in the next step, but if I did that first, I'd be unable to get back the shading in the centre which makes the details there more visible.
Here I've restored the vibrancy of the colours and sharpened the detail. The greens were still pretty dull and there was little to work with there. I jazzed them up as much as I could without making them look too fake:
I also selectively brought out the bee by brightening only the mid-brightness areas, leaving the shadows dark. For "naturalness", I'd call this image finished.
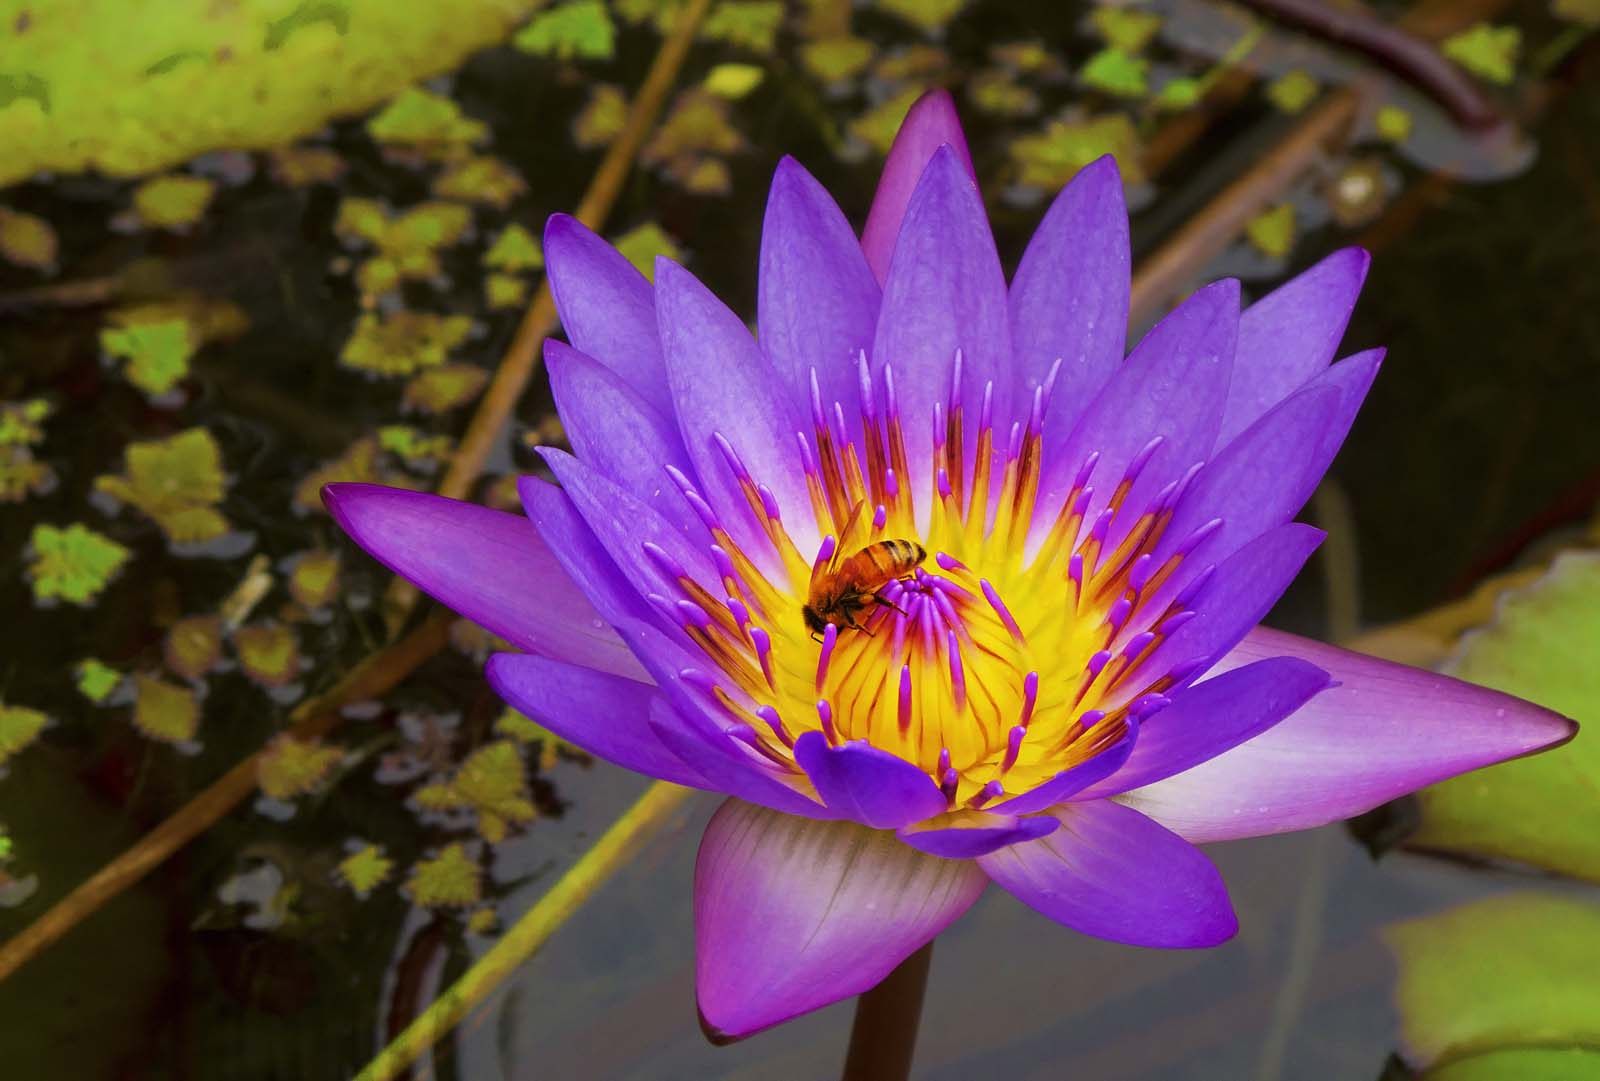
Yet, the image still lacked zing. After scratching my head for a while, I decided to abandon all caution and dip into the Artistic Filters in Photoshop. For this shot I chose Poster Edges and applied it with some restraint:
It's easy to go too far with Poster Edges. All I wanted was just a bit more outlining of the petals and a little more definition of the detail in the centre of the blossom.
There. It's done.
I've known a great number of people who had a good eye for an image and produced great pictures, but were unhappy with their images for a variety of reasons. All of these vague dissatisfactions can be evaporated by a little patience learning to use a few tools in an image editing program. One doesn't have to spend anything to get in the game. There are lots of free choices. Though not as slick, GIMP is a good editing program that will do just about everything that Photoshop will do, at least the things that a sane person would want.
I've taught many people to edit their images in just a few sessions of an hour or two. Once one is "over the hump" of the learning curve, self instruction is easy, considering the huge number of free tutorials available on the web.
The initial learning process can be a little frustrating, as I do not allow one to write down keystroke-by-keystroke instructions. I have found that rapid progress and retention come from understanding the process rather than memorizing the steps. I've also found that a glass of nice Merlot makes the whole learning experience much more enjoyable for both student and teacher.
Imagine that.
Porsche 977 Turbo. Worked on as part of Fix My Pic. background removed then the body work cleaned up to remove dirt and grime windows tinted out then a lot of work dodging and burning and put light layers over the body work to bring out the reflections and shadow detail then finally selected the brake callipers and turned the rest of the image to black and white then a little more work done to smooth the light and shadow blending finally a slight crop added to create a brochure style car shot.
To see original image click on the link below so you can compare before and after work.
www.flickr.com/photos/mazdamiata/2308731274/in/pool-fixmypic
Image manipulations of my original images by Louise wagstaff. Model Emma Preston looks so Fantastic they have had a lot of interest on Facebook
My painting of the daycruise ferry Viking ADCC ordered by Viking Line in 2008. She was never delivered to Viking and remained unfinished for about ten years.
Don't believe anything you see nor hear. Lee - Before and after image manipulation. Almost anything can seem to happen with digital retouching.
And here are the second two. Your pages will appear in the order indicated (and the orientation, so you won't screw it up as we did the first time around).
I'm not exactly a whiz with the digital image manipulation programs. Luckily, non-whizzes can muddle through something like Photoshop to make this. Or you can get all old-skool and do some paste-up of your master copy, too. PLATFORM used to be almost all paste-up -- believe it.
To see the animated image scroll down to the first comment (below).
Details and History
This stereoview is from a short lived publisher of original images in business from 1890-1905.
Obverse text:
Stolen Fruit two Giddy Bicycle Girls
International Stereoscopic View Co.
New York City, USA
Quick Links to Related images
View source stereoview.
Animated stereo images with bicycles.
See all images by the International Stereoscopic View Co.
Copyright Advisory
The original image has no indicated copyright but is believed published before 1905. All copyrightable material published before 1923 in the United States is now in the public domain due to expiration of the copyright. The derivative works presented here are placed under creative commons license with the assumption the above is true.
Technical trivia
Image manipulations and gif generation performed with StereoPhotoMaker, a freeware program by Masuji Suto & David Sykes.
"The old Lakota was wise. He knew that man's heart away from nature becomes hard; he knew that lack of respect for growing, living things soon led to lack of respect for humans too."
Chief Luther Standing Bear
This abstract image was created with G.I.M.P. (GNU Image Manipulation Program - www.gimp.org). Public domain Licensing - I, Vern B. Southern at winningwebdesigners.com, the copyright holder of this work, hereby release it into the public domain. This applies worldwide for use in the public domain free of charge as computer background wallpaper or any other use.
Does it look like I am a giant, or does it look like the car is a miniature (or both or none of the above) ?
Photo/Image/Picture Editor:
We would like to take this opportunity of briefly introducing M/s. The SaaDo Design Service Center (TSDSC), which is a well-established company for the past 05 years, with business transactions being carried out in International. The company deals with a varied range of design namely.
Photoshop & Photography
Digital Image Editing, Photo Clipping Path, Image Background Knockout, Image Drop Shadow, Image Reflection Shadow, Image Soft Shadow, Image Mirror Effect, Color Correction Masking, Photo Colorization, Cartoons & Caricatures, Image Layer Masking, Transparency Masking, Translucent Masking, Alpha Channel Masking, Image Conversion Service, Photo Retouching, Photo Restoration, Image Manipulation, Image Enhancing, Image Brightening, Image Darkness, Photo Raster to Vector, Photo Vector to Raster, Face Touch up.
Graphic Design
Logo Design, Page & Book Design, Architecture, Wallpapers, Packaging Design, Label Design, Clothing Design, Clothing Graphics, Portable Advertising, Branding Solutions, Vehicle Signage, Store Front Graphics, Vector Drawings, Technical Drawings, Web Design, Web Graphics, Presentations, Emails & Newsletters
Print Design
Illustrations, Stationery Design, Business Cards, Flyers & Brochures, Letterheads, Banners & Headers, Label & Package Design, Landing Pages, Catalogues, Corporate Identity Kit, Poster
Website & Development
Static, Dynamic & E-Commerce
Order Me Here:
www.Fiverr.com/tsdclippingpath
www.gigbucks.com/user/tsdclippingpath
www.zeerk.com/user-profile/tsdclippingpath
www.tenbux.com/user/tsdclippingpath
www.Elance.com/s/tsdbobita/portfolio
www.Odesk.com/users/~01746d4ccb966f86ff
Email: info@4clippingpath.com
Skype: TSDClippingPath
Gtalk: TheSaaDo
Yahoo: TheSaaDo
AIM: TheSaaDo
MSN: TheSaaDo
Regards,
The SaaDo Clipping Path Ltd.
Elance: www.Elance.com/s/tsdbobita/portfolio
Odesk: www.Odesk.com/users/~01746d4ccb966f86ff
Peopleperhore: www.PPH.me/Bobita
Donanza: www.Donanza.me/tsdbobita
Fiver: www.Fiverr.com/tsdclippingpath
Firm on the web:
FaceBook: www.Facebook.com/tsdclippingpath
Twtter: www.Twitter.com/tsdclippingpath
linkedin: www.Linkedin.com/pub/bobita-dey/64/524/303
Skillpage: www.Skillpages.com/thesaadoclippingpath.ltd
www.Elance.com/s/tsdbobita/portfolio
www.Odesk.com/users/~01746d4ccb966f86ff
www.Facebook.com/tsdclippingpath
www.Twitter.com/tsdclippingpath
www.Linkedin.com/pub/bobita-dey/64/524/303
www.Skillpages.com/thesaadoclippingpath.ltd
www.Fiverr.com/tsdclippingpath
www.gigbucks.com/user/tsdclippingpath
www.zeerk.com/user-profile/tsdclippingpath
www.tenbux.com/user/tsdclippingpath
www.Elance.com/s/tsdbobita/portfolio