View allAll Photos Tagged 16bit
12 x 600s Lum 1x1 binned
50 x 300s Lum 1x1 binned
Processed in DSS, CS5 and LR3
DSS process:- 3 groups registered using Standard Mode, Entropy Weighted Average (HDR)
CS5 process:- 5 x Levels, convert to 16bit, levels, 3 x selective curves, Noel's Contrast Enhance, Noel's Enhance DSO reduce stars, Noel's Deep Space Noise Reduction, Selective high pass filtering, Selective Smart Sharpening, Star Spikes Pro.
LR3 process:- Noise reduction, Selective Clarity, Recovery adjustment to improve the core.
RGB to come weather permitting :-)
Even the enormous Rawhide Power Plant in northeastern Colorado turns to tiny in context...
Image Notes: This intense cloud-laden high contrast scene with an incredibly wide dynamic range made for a perfect excuse to do some HDR. This photograph is based on 7 exposures 1EV apart (-3EV - +3EV), merged in Photoshop & then tone-mapped with Photomatix for contrast/luminosity and tone-mapped in Dynamic Photo HDR for color. These two resulting HDR files were then layered on the 0 EV exposure and blended down, the Photomatix one primarily in luminosity mode and the Dynamic Photo-HDR on color. Finally, I made a copy of that file and converted it to 8bit where a slight bit of LucisArt was applied to bring out extra cloud details (1 pass exposure at 60% and faded on luminosity at 45% opacity and 1 pass Wyeth at 40% and faded on luminosity at 25% opacity). The LucisArt image was then placed back on the 16bit working file and blended down at around 70% opacity. That's the main workflow. One other key ingredient was Noiseware Pro which was applied on a surface mask to protect detail.
This is from my most recent trip to Cuba shooting for my "Turning the Last Page: of 1962" book project. I am working on three books in this series Cuba, Burma and India. I am fascinated by reflections and the abstracts that frequently occur in the objects tat are doing the reflecting. I was an absolute joy to be shooing in Cuba with the D850. I would have posted sooner, but my work laptop's hard drive decided that it was done working as I was waiting to board my flight to Havana. I have been on the road since the 8th. I have finally got my laptop to cooperate if I boot off of an external hard drive. Not the fastest way to post process a 45.7mp raw file....
the imaging pathway is as follows: Lightroom Classic was used as the browser to make selects, then using the open directly plugin for Lightroom the selected file was sent to Nikon Capture NX-D for raw conversion saved as a 16bit tiff in the Prophoto Colorspace. File was then post processed in Photoshop 2018 and the Nik Collection by DxO was used in conjunction with Photoshop to image edit this image.
#Nikon100 #NikonAmbassador #nikonlove #lexar #kelbyone #photography #onOne @NikonUSA #D850#24-120mm #NikonNoFilter #niksoftware #nikonUSA #Epson #wacom #xritephoto #onone #sunbounce #fineartphotography #DxO #iamgenerationimage #iamnikon #B&H #PhotogenicbyBenQ #lexarMemory #nikonLOVE @lexarmemory elite photographer #lexarmemory
good morning/evening everyone!
here's another view of the horseshoe falls at Niagara.
also when you get a chance stop by at my small project and let me know what you think.
mikeafotografika.blogspot.com/
happy Thursday !!!
Camera: Nikon D700
Exposure: 0.25 sec (1/4)
Aperture: f/11.0
Focal Length: 20 mm
ISO Speed: 100
Crop: True
Tripod: True
Filter: Filter: Lee Soft Natural Density graduated filters .9 & .6 (5 stops)
Software: Adobe Photoshop CS4 Windows (raw edit @ 16 bit)
1 exposure shot at 14bit NEF file, opened and edited in CS4 raw as a single shot at 16bit sRGB for a less destructive edit.. not HDR processed
I was looking around in my garden when I spotted a mantis climbing up a young palm tree leaf. I just got really low and waited ... eventually he/she reached a spot that I thought was compositionally ok and ... voila :)
I wished the background was more interesting , but the backlight compensates , imo , for any lack of interest.. I always leave things as they are never substituting backgrounds in PS.
Camera Nikon D800 , handheld , lens Tamron 90mm F/2.8 @F/13 , shutter 1/250 , ISO 100 , Aperture priority .
Single Neff file , imported into lightroom for exposure correction , passed to PS6 as a 16bit Neff , for cropping and minor spot removal , exported in sRGB jpeg for Web.
Thank you for viewing and commenting
All rights reserved - Copyright © Charles Charalambous.
You are not allowed to download, copy, share, distribute, print or display this image on the internet or anywhere else without my written approval
Happy Thursday my friends!!!
Camera: Nikon D700
Exposure: 0.5
Aperture: f/11.0
Focal Length: 35 mm
ISO Speed: 100
Crop: False
Tripod: Yes
Filter: Lee Soft Natural Density graduated filters .3 + .9 (4 stops)
Software: Adobe Photoshop CS4 Windows (raw edit @ 16 bit)
1 exposure shot at 14bit NEF file, opened and edited in CS4 raw as a single shot at 16bit sRGB for a less destructive edit.. not HDR processed
Happy Tuesday my friends and everyone!!
hope you had a nice week and weekend while i was away.
glad to be back home!
Camera: Nikon D700
Exposure: 0.25 sec (1/4)
Aperture: f/11.0
Focal Length: 20 mm
ISO Speed: 100
Crop: True
Tripod: True
Filter: Filter: Lee Soft Natural Density graduated filters .9 & .6 (5 stops)
Software: Adobe Photoshop CS4 Windows (raw edit @ 16 bit)
1 exposure shot at 14bit NEF file, opened and edited in CS4 raw as a single shot at 16bit sRGB for a less destructive edit.. not HDR processed
e x p l o r e d
A Hydrogen-Alpha + Oxygen III + Sulphur II Narrowband widefield image of the Cygnus Wall. The North America Nebula (NGC 7000 or Caldwell 20) is an emission nebula in the constellation Cygnus, close to the star Deneb. The remarkable shape of the nebula resembles that of the continent of North America, complete with a prominent Gulf of Mexico.
The Cygnus Wall:
The Cygnus Wall is a term for the "Mexico and Central America part" of the North America Nebula. The Cygnus Wall has the most concentrated star formation in the nebula. The North America Nebula and the nearby Pelican Nebula, (IC 5070) are in fact parts of the same interstellar cloud of ionized hydrogen (H II region). The nebula complex is estimated to be about 1,800 light-years from Earth.
Gear:
William Optics Star 71mm f/4.9 Imaging APO Refractor Telescope.
William Optics 50mm Finder Scope.
Celestron SkySync GPS Accessory.
Orion Mini 50mm Guide Scope.
Orion StarShoot Autoguider.
Celestron AVX Mount.
QHYCCD PoleMaster.
Celestron StarSense.
QHYCFW2-M-US Filterwheel (7 position x 36mm).
QHY163M Cooled CMOS Monochrome Astronomy Camera.
Tech:
Guiding in Open PHD 2.6.3.
Image acquisition in Sequence Generator Pro.
Lights/Subs:
2 Stage Cooled CMOS
Imaged at -25°C
Gain: 20
Offset: 80
Narrowband:
S = 12 x 600 sec. 16bit FITS.
H = 12 x 600 sec. 16bit FITS.
O = 12 x 600 sec. 16bit FITS.
Calibration Frames:
50 x Bias/Offset.
25 x Darks.
20 x Flats & Dark Flats.
PixelMath RGB Channel Combination:
PixInsight Expression:
R = SII
G = (Ha*OIII)*1.5
B = OIII
Image Acquisition:
Sequence Generator Pro with the Mosaic and Framing Wizard.
Plate Solving:
Astrometry.net ANSVR Solver via SGP.
Processing:
Pre-Processing and Linear workflow in PixInsight,
and finished in Photoshop.
Photographed in the following wavelengths of light:
Optolong SHO Narrowband filters:
OIII line 500.7nm (6.5nm bandwidth)
H-Alpha line 656nm (7nm bandwidth)
SII line 672nm (6.5nm bandwidth)
Astrometry Info:
View the Annotated Sky Chart for this image.
Center RA, Dec: 314.764, 44.279
Center RA, hms: 20h 59m 03.425s
Center Dec, dms: +44° 16' 43.955"
Size: 2.27 x 1.55 deg
Radius: 1.375 deg
Pixel scale: 5.11 arcsec/pixel
Orientation: Up is 97.9 degrees E of N
View this image in the World Wide Telescope.
&creditsUrl=&ra=314.736056&dec=44.241585&x=828.5&y=556.0&rotation=97.94&thumb=http://nova.astrometry.net/image/3793834)
Martin
-
[Home Page] [Photography Showcase] [My Free Photo App]
[Flickr Profile] [Facebook] [Twitter] [My Science & Physics Page]
►►► Explore the world of HDR with me at farbspiel-photo.com - View. Learn. Connect.
______________________________________________________________________
About | HDR Cookbook | Before-and-After | Making-of | Pics to play with
______________________________________________________________________
(Hit 'f' to fave this image)
Watch the Before-and-After Comparison to see where this photo comes from!
The story of this photo:
This image was quite a lot of work, I can tell ya! Getting out all the pretty details of that church literally wore out my graphics tablet. I may have to get a new one after this. Anyway, this is a beautiful Baroque-Rococo basilica with a very rich interior. It is really busy in May when all the Pilgrimages arrive there after having walked hundreds of kilometers. Of course, tripods were prohibited, so this is another hand-held vertorama.
Enjoy!
Take a look at my "HDR Cookbook"! It contains some more information on my techniques.
How it was shot:
> Taken handheld (Read more about the technique!)
> 5x3 autobracketed shots (three exposures each, with 0, -2, +2 ev)
> Camera: Nikon D7000
> Lens: Sigma 10-20mm F3,5 EX DC HSM
> Details can be found here
How it was stitched and tonemapped:
> Created TIFFs from the RAW files in ACR - reducing CA [details] and setting the same white balance for each shot
> Topaz Denois on the resulting TIFF images
> Created additional exposures with -4EV and +4EV with ACR to control the highlights and shadows [details]
> Created 5 tone-mapped images from the TIFF files using Photomatix Pro 4.0 (Detail Enhancer)
> Saved the images as 16bit TIFs
> Stitched the 5 TIFs using Photoshop
How it was post-processed:
> Post-processing was done in Photoshop
> Slight perspective correction and cropping
> Topaz Adjust on the entire image to get back the colors and the details [details]
> Topaz Infocus on the entire image for sharpening
> Saturation layer on the gray ornaments (desaturation)
> Photo filter layer on the gray ornaments (blue)
> Levels layer on the gray ornaments (more contrast)
> Saturation layer on the golden elements (yellows)
> Levels layer on the golden elements (more contrast)
> Saturation layer on the marble (master, yellows)
> Vibrance layer on the marble (more vibrance)
> Curves layer on the floor (more contrast)
> Saturation layer on the floor (master)
> Saturation layer on the paintings (master)
> Levels layer on the paintings (more contrast)
> Saturation layers on the green and yellow parts (master)
> Saturation layer on the white walls (desaturation)
> Levels layer on the white walls (more contrast)
> Vignette effect using a masked fill layer [details]
> Sharpening using the high-pass filter [details]
> Watermarking
______________________________________________________________________
Learn these techniques at farbspiel-photo.com - View. Learn. Connect.
- Thanks for viewing!
►►► Explore the world of HDR with me at farbspiel-photo.com - View. Learn. Connect.
______________________________________________________________________
About | HDR Cookbook | Before-and-After | Making-of | Pics to play with
______________________________________________________________________
(Hit 'f' to fave this image)
The story of this photo:
St. Jodok is one of the catholic churches of Ravensburg in southern Germany. What I find most remarkable about his church is the composition of colors. The bright white of the walls, the wooden tones and the turquoise/red colors of the organ are quite unique, I think.
Take a look at my "HDR Cookbook"! It contains some more information on my techniques.
How it was shot:
> Taken handheld (Read more about the technique!)
> 6x3 autobracketed shots (three exposures each with 0, -2, +2 ev)
> Camera: Nikon D90
> Lens: Sigma 10-20mm F3,5 EX DC HSM
> Details can be found here
How it was stitched and tonemapped:
> Preparation: Developed the RAW files in ACR (consistent white balance, CA correction [details])
> Created 6 HDRs (32 bit) using Photomatix Pro 4.0
> Stitched the 6 HDRs using Photoshop and saved in OpenEXR format (some distortion correction and cropping before saving)
> Tonemapped resulting panorama HDR using Photomatix Pro 4.0 (Detail Enhancer)
> Saved as 16bit TIF
> Take a look here for a more detailed description.
How it was post-processed:
> Post-processing was done in Photoshop
> Topaz Adjust on the entire image to get back the colors and the details [details]
> Topaz Denoise (more aggressively on the white walls) [details]
> Saturation layer on the white walls (slight desaturation)
> Levels layer on the white walls (slight increase of contrast)
> Saturation layer on the wooden parts (master)
> Levels layer on the wooden parts (slight brightening)
> Saturation layer on the pillars (slight desaturation)
> Global saturation layer to fine-tune the colors
> Sharpening using the high-pass filter [details]
> Watermarking
______________________________________________________________________
Learn these techniques at farbspiel-photo.com - View. Learn. Connect.
- Thanks for viewing!
The wobbling motion of the Moon's orbit around Earth, as it completes a Phase cycle in the Southern Hemisphere.
"High and low tides are caused by the Moon. The Moon's gravitational pull generates something called the tidal force. The tidal force causes Earth — and its water — to bulge out on the side closest to the Moon and the side farthest from the Moon." ― NOAA (National Oceanic and Atmospheric Administration).
Video Resolution:
Full HD 1920 x 1080 pixels at 30 fps.
Original Source: 8K 16bit RAW (Linear Gamma 2.2).
View in Full HD on Vimeo at a higher resolution and bitrate:
vimeo.com/mheigan/dance-of-the-moon
Martin
-
[Home Page] [Photography Showcase] [eBook] [Twitter]
This is another one of the images from the 105mm f1.4 lens shoot. The camera was the fabulous Nikon D5.
To make sure we are all on the same page, there are always two aspects to every shoot. "The Shoot" itself and the post processing to final art. This image contains both aspects and is the outcome of the post processing this is a copy of that final file.
For "the shoot" aspect of this project no artificial light, no make-up on the subjects, no reflectors or diffusers. Just the lens. Just the camera. Just the light that was there. Just the subject. Suffice it to say I was the weakest link in the entire project.
This is an image ofstraberries and blueberries that I purchased at the Portreo Hill Farmer's market in San Francisco.
The light source was sunlight coming through the windows a friend's 30,000 sq ft warehouse in SF.
All I can say is thank God for Nikon's amazing focusing speed on the D5 as well as group focus feature! And thank God for 12 fps and a 200 shoot buffer when shooting RAW in frame waster mode. Talk about being taken by your subject to take a photograph. I truly just held on and was pulled through the camera!
When asked what is the best light W. Eugene Smith said "Why the best light is available light and by available light I mean any damn light that is available." Works for me
I have always held that the lens is the brush, the camera sensor is the canvas. I have also held the that the beauty of a lens is not in how well it handles focus but rather how well it handles from in focus to blur. I am by proclivity a zoom guy. For me to say what I am about to say means that one of these brushes will be staying home.This lens has a permanent place in my camera bag.
There is no image I cannot capture. There is no image in which my vision of the image and the beauty of moment that took me that is not enhanced by the beauty of the glass and lens design of the 105mm f1.4.
This has to be the sharpest lens I have ever used. It is also has the most beautiful Bokeh of any lens I have ever shot with as well.
So you want to know why I choose Nikon? Now you know.
Because of the D5/D500- I AM: A Super Hero. Because of the 105mm f1.4 I AM: A Super Hero with beautiful Bokeh..
NOTE: I do indeed use Photoshop. It's true. Have been since version 1. when it fit on a single floppy disc. Most inspired piece of software ever written. I was employee number 2 of Niksoftware (colorefex, SilverEfex) and employee number 6 of Altamira Group (the inventor of Genuine Fractals) so yes I do also use plug-ins. So if you are viewing an image on my personal pages, website and sundry feeds they are all post processed if I put them up.
To be very crystal clear ALL of my images that I post on my personal web feeds are post processed.
So that this non issue is no issue these are my "FINAL" versions on my PERSONAL sites. Because it is my personal page I do reserve the right to delete comments from internet trolls.
I always make it a point, If you read the full description of any of my images, to always list the software and hardware used to produce an image.
Nikon D5 camera, 105mm f1.4 lens. Recorded to Lexar XQD media Raw conversion done in Capture NX-D. converted to a 16bit Prohoto colorspace .TIFF. Further post processing Photoshop CC 2015.5, Nik collection by Google, oNonesoftware ver.10.5. Wacom Cintiq 27QHD, Benq SW2700 monitor (for approval color)
© Vincent Versace 2016
#NikonAmbassador #nikonlove #D5 #105mm #lexar #kelbyone #photography #onOne@NikonUSA #NikonNoFilter #niksoftware #nikonUSA #Epson #wacom #xritephoto #onone #fjwestcott #fineartphotography #iamgenerationimage #iamnikon #B&H #PhotogenicbyBenQ #lexarMemory #nikonLOVE
►►► Explore the world of HDR with me at farbspiel-photo.com - View. Learn. Connect.
______________________________________________________________________
About | HDR Cookbook | Before-and-After | Making-of | Pics to play with
______________________________________________________________________
(Hit 'f' to fave this image)
Watch the Before and After - Comparison to see where this photo comes from!
The story of this photo:
This is a 9-shot pseudo HDR panorama of the famous "James Bond" rock in the bay of Phang Nga, Thailand. You can find another (real) HDR shot of this rock here. The rock appeared in the 1974 James Bond movie "The Man With the Golden Gun" and has been a major tourist attraction every since. The shot was taken from a different position with a better view over the whole bay than the previous shot I uploaded. This place is awesome and mystical in a way.
It is the first time I have tried to do a proper HDR panorama and it was quite interesting to discover the corresponding workflow. Thank god, I have a fast 64bit PC with a 64bit operating system and lots of memory. During post processing, the document got more than 3 GB big at times. I have done panorama shots before with different gear, some of which was self-made. This was the first time I traveled with a monopod fitted with a simple but flexible and effective macro rail that I use as a panorama head. I have been searching and experimenting for some time to find the ideal solution to shoot panoramas quickly, reliably (avoiding problems in stitching) and at a reasonable price. And this is the perfect combination.
Take a look at my "HDR Cookbook"! It contains some more information on my techniques.
How it was shot:
> Taken with a monopod (using a Kirk macro rail as panorama head)
> 9 Exposures (stitched later)
> Camera: Nikon D90
> Lens: Nikon AF-S DX Nikkor 18-200mm 1:3,5-5,6G ED VR
> Details can be found here
How it was stitched and tonemapped:
> Developed three TIFs from each of the 9 RAW files using Adobe Camera Raw (+2, 0, -2 ev)
> Created 9 HDRs (32 bit) using Photomatix version 3.1
> Stitched the 9 HDRs using Photoshop and saved in OpenEXR format
> Tonemapped resulting panorama HDR using Photomatix version 3.1 (Detail Enhancer)
> Saved as 16bit TIF
> Take a look here for a more detailed description.
How it was post-processed:
> Post-processing was done in Photoshop
> Topaz Adjust on the foreground (everything except the sky) to enhance the details and the colors [details]
> Curves layer on the water to enhance the reflections and the contrast
> Photo filter layer with a gradient mask on the water to enhance the orange tones in the foreground
> Saturation layer on the water for overall color enhancement
> Saturation and Levels layers on he sky to enhance the blue tones and the contrast
> Saturation layer on the rocks to tone down the reds and increase the yellows
> Curves layer on the rocks to tune the contrast
> Halo reduction in the sky using a levels adjustment layer (gamma ~ 0.8) and delicate masking to blend this darker layer into those halo spots [details]
> Topaz Denoise [details]
> Sharpening on the foreground using the high-pass filter [details]
______________________________________________________________________
Learn these techniques at farbspiel-photo.com - View. Learn. Connect.
- Thanks for viewing!
►►► Explore the world of HDR with me at farbspiel-photo.com - View. Learn. Connect.
______________________________________________________________________
About | HDR Cookbook | Before-and-After | Making-of | Pics to play with
______________________________________________________________________
(Hit 'f' to fave this image)
Explored! Highest position: 499 on Monday, October 25, 2010
Man, this one barely snuck in! After two of my last three uploads scratched Explore without being picked up by Scout , this one finally got recorded. :-)
The story of this photo:
It seem that every serious HDR photographer needs to have a few standard shots in his/her portfolio. Some abandoned car wreck, some shot from under a bridge, some shot of a pier going out into the sea, some sunset shot with rocks and water in the foreground, a cloister shot etc etc etc.
I have made a shocking discovery: I have none of these in my stream!!!
Now is the time to change this! So here is a cloister shot. :-)
This was shot in the abbey of Monreale in Italy. I have tried to recreate the wonderful light that I experienced when I was there. Unfortunately, my time there was quite limited and there were a lot of other people there. So, no chance of shooting this without those tourists. I upgraded to Photomatix Pro 4.0 recently, so this was a chance to test the semi-automatic deghosting feature. It worked reasonably well. Anyway, just ignore the people and enjoy the cloister!
If you are interested, take a look at my "HDR Cookbook". It contains some more information on my workflow and techniques.
How it was shot:
> Taken handheld [details]
> Three exposures (0, -2, +2 ev) autobracketed and merged to get and HDR
> Camera: Nikon D90
> Lens: Sigma 10-20mm F3,5 EX DC HSM
> Details can be found here
How it was tonemapped:
> Preparation: Developed the RAW files in ACR mainly for CA correction [details]
> HDR creation and tonemapping using Photomatix Pro 4.0 (Detail Enhancer)
> Saved as 16bit TIF
How it was post-processed:
> Post-processing was done in Photoshop
> Transformation correction (straightening, slight partial distortion correction to make the image symmetrical)
> Topaz Adjust on the entire image to get back the colors and the details [details]
> Topaz Denoise on the entire image [details]
> Levels layer on the sky (brightening)
> Levels layer on the floor (more contrast)
> Saturation layer on the floor (slight desaturation)
> Levels layer on the plants (darkening)
> Levels layer on the masonry (more contrast)
> Levels layer on the ceiling (more contrast)
> Saturation layer on the ceiling (master)
> Global saturation layer (master)
> Global levels layer (fine-tuning contrast)
> Vignette effect using a masked fill layer [details]
> Sharpening using the high-pass filter [details]
> Watermarking
______________________________________________________________________
Learn these techniques at farbspiel-photo.com - View. Learn. Connect.
- Thanks for viewing!
M42, der große Orionnebel mit dem "Running Man" Nebel. Aufgenommen mit Nikon D5100 am ED102 Apo-Refraktor auf CGEM Montierung. Ohne Nachführung, mit PEC Training 14 Aufnahmen je 2min/ISO3200 durch CLS Filter. Alle RAW Aufnahmen mit RawTherapee in 16Bit PNG Bilder entwickelt. Die PNG Bilder in Gimp 2.9.5 eingelesen, ausgerichtet, summiert. Anschliessend drei Teilbilder mit unterschiedlichen Bildanteilen (Einzelaufnahme, 7% und 10% Bildanteil) extrahiert und in fotoxx als HDR Verbund verarbeitet. Anschliessend Nachbearabeitung in Gimp 2.9.5.
M42, the great Orion nebula and "Running Man" nebula. Taken with Nikon D5100 at ED102 Apo refractor on CGEM mount. No guiding, but PEC control active. 14 frames of 2min/ISO3200 each with CLS filter. All raw frames developed with RawTherapee into 16Bit PNG files. The PNG files are read into Gimp 2.9.5, aligned and summed up. Three excerpt images with 1 single frame, 7% and 10% frame contribution read into fotoxx and made an HDR compound. The HDR compound was given a final touch with Gimp 2.9.5.
Processing:
HDR photo made of a single RAW - Photomatix Pro 3 (RAW to TIFF 16bit)
straightening the horizon + new crop - Photoshop CS3 (TIFF to JPEG)
Follow me in Instagramm
►►► Explore the world of HDR with me at farbspiel-photo.com - View. Learn. Connect.
______________________________________________________________________
About | HDR Cookbook | Before-and-After | Making-of | Pics to play with
______________________________________________________________________
(Hit 'f' to fave this image)
The story of this photo:
This is a shot of the Sushi restaurant on the AIDAbella cruise ship. I liked the atmosphere with those red and yellow tones. However, we never got around to eat there. Do you like Sushi? Then go ahead and order some!
Enjoy your meal and the photo, of course!
Take a look at my "HDR Cookbook"! It contains some more information on my techniques.
How it was shot:
> Camera put on the table
> Camera: Nikon D90
> Lens: Sigma 10-20mm F3,5 EX DC HSM
> Details can be found here
How it was tonemapped:
> HDR creation and tonemapping using Photomatix version 3.1 (Detail Enhancer)
> Saved as 16bit TIF
How it was post-processed:
> Post-processing was done in Photoshop
> Topaz Adjust on the entire image to get back the colors and the details [details]
> Topaz Denoise (more aggressive in some areas with high noise) [details]
> Saturation layers on the yellow and red areas to tune the tones
> Global Levels layer to tune the contrast
> Distortion transformation to get everything straight
> Some cropping
> Vignette effect using a masked fill layer [details]
> Sharpening using the high-pass filter [details]
______________________________________________________________________
Learn these techniques at farbspiel-photo.com - View. Learn. Connect.
- Thanks for viewing!
Großer Zehliner See, near Dorf Zehlin, Ruppiner Land, Brandenburg
Larger Version (recommended) | Visit my website
About:
Vertorama from 3 horizontal shots
Technic details:
Nikon D50
Tokina AT-X 124 AF PRO DX @ 18mm
Exposure 1/30 sec, f/13, ISO 200
polarizer B+W
RAW files processed with Nikon Capture NX
TIFF 16bit files processed with Photoshop
Please don't use this image on websites, blogs or other media without my explicit permission. © 2009 Dietrich Bojko, All rights reserved.
►►► Explore the world of HDR with me at farbspiel-photo.com - View. Learn. Connect.
______________________________________________________________________
About | HDR Cookbook | Before-and-After | Making-of | Pics to play with
______________________________________________________________________
(Hit 'f' to fave this image)
Explored: Highest position: 89 on Monday, May 2, 2011
Watch the Before-and-After Comparison to see where this photo comes from!
The story of this photo:
For the first time in a long time, I have managed to upload two images on one weekend. Yippie! This is another shot from Ludwigsburg Palace. This time a vertorama from the entrance area that highlights the beautiful baroque style of the sculptures and paintings.
Enjoy!
Take a look at my "HDR Cookbook"! It contains some more information on my techniques.
How it was shot:
> Taken handheld (Read more about the technique!)
> 5x3 autobracketed shots (three exposures each with 0, -2, +2 EV)
> Camera: Nikon D7000
> Lens: Sigma 10-20mm F3,5 EX DC HSM
> Details can be found here
How it was stitched and tonemapped:
> Created 5 tone-mapped images directly from the RAW files using Photomatix Pro 4.0 (Detail Enhancer)
> Created two additional exposures in ACR (+4EV and -4EV) to preserve highlights and shadows [details]
> Saved the images as 16bit TIFs
> Stitched the 5 TIFs using Photoshop
How it was post-processed:
> Post-processing was done in Photoshop
> Topaz Adjust on the entire image to get back the colors and the details [details]
> Topaz Denoise [details]
> Topaz Infocus on the entire image for sharpening
> Saturation layer on the figures on the wall (desaturation)
> Photo filter layer (orange) on the ornaments above the arches
> Saturation layer on the paintings on the ceiling (master)
> Saturation layer on the golden parts in the ceiling (yellows)
> Global saturation layer (master)
> Global levels layer (more contrast)
> Vignette effect using a masked fill layer [details]
> Sharpening using the high-pass filter [details]
> Watermarking
______________________________________________________________________
Learn these techniques at farbspiel-photo.com - View. Learn. Connect.
- Thanks for viewing!
This is my first composited image using files from the Nikon D800 and they are HUGE. The final file size for this image is around 5gigs(!) working at full resolution and in 16bit. I have to say the D800 is a great tool for capturing backdrops for this style of work. The files have amazing detail and allow great latitude for zooming, cropping, and placement. For studio work at a slow pace it works great as well but if you're firing shots at a steady rate get ready to encounter the buffer, even while tethered.
For Strobist, this was a five light set-up; boomed beauty dish in front of model from camera right, 5ft octa camera left for fill, two strip boxes roughly at 45 degree angles back of the model and a gridded strobe back left. All lights are Einsteins and triggered with PW's.
For the curious, the image was taken with:
- X-T2 in fully manual exposure, bracketing mode (0 -3EV), 200 ISO, RAW
- Samyang 8mm fisheye UMC II f2.8 at f8, focus at Infinity mark
- mounted on a Nodal Ninja travel pole fully extended at 3 meters
- 4 shots around pitched at -15° + Nadir + Zenith
- Capture One Express to convert RAF to Tiff 16bit ProPhoto with default settings (no exposure modifications) and CA
- Aurora HDR for tone mapping and degosthing the bracketed pics
- PTgui PRO to stitch the images to the final equirectangular image (360°)
- Photoshop for the final editing and Flexify2 for the Balloon projection
On the evening of August 26, the Rainbow Bridge in Tokyo Bay was lit up in seven colors to mark the 30th anniversary of its opening.
I chose a 90-second exposure to add the trails of light from the houseboats passing by in Tokyo Bay to the beautifully illuminated bridge.
In the background, you can see Tokyo Tower lit up in summer colors and the skyscrapers of Tokyo.
2023年8月26日20:00、開通30周年を祝うためレインボーブリッジが7色にライトアップされました。
久しぶりにレインボーカラーをまとったレインボーブリッジに、屋形船の光跡を添えて撮影した東京湾岸夜景。
Pentax K-3,PENTAX-DA 18-55mm F3.5-5.6 AL WR.
On August 26, 2023, 20:09.
Focal 18mm / Aperture f20 / ISO100 / Exposure 90s.
RAW development (16bit TIFF) in Adobe Photoshop Lightroom Classic CC, digital blending with Raya Pro 6.0 (luminosity mask), and adding precise contrast with Nik Collection Color Efex Pro 4.
©45tmr 2023, All Rights Reserved.
DO NOT use this "watermarked" photo in any way (copying, downloading or reproducing) without permission.
1966 Rolleiflex 3.5f Planar Type4
Rollei UV filter
Rolleifix and Giotto vitruvian tripod
Ilford FP4 PLUS@125
Ilfosol3 (1+9) 20deg 6min 30 sec
EpsonV600
(2,400dpi, 16bit grey, med sharp)
Aperture
Straight out of camera
First roll of film out of the camera since it's return from Newton Ellis, noticeably smoother to select aperture and f stop. As suspected it was the retaining screw for the self timer that had fallen into the camera blocking first the aperture setting then the winding mechanism.
►►► Explore the world of HDR with me at farbspiel-photo.com - View. Learn. Connect.
______________________________________________________________________
About | HDR Cookbook | Before-and-After | Making-of | Pics to play with
______________________________________________________________________
(Hit 'f' to fave this image)
The story of this photo:
This shot was taken in Sidi Bou Said, a place near Tunis where many artists (also western artists) were staying to seek inspiration. This town was famous for inspiring artists. All buildings in this town are white with blue windows and doors. This gives the place a unique look. Today it is a major tourist attraction that is probably not missing on any guided tour through Tunis.
Take a look at my "HDR Cookbook"! It contains some more information on my techniques.
How it was shot:
> Taken handheld
> Camera: Nikon D90
> Lens: Sigma 10-20mm F3,5 EX DC HSM
> Details can be found here
How it was tonemapped:
> Preparation: developed the raw files with ACR mainly in order to reduce the CA [details]
> HDR creation and tonemapping using Photomatix version 3.1 (Detail Enhancer)
> Saved as 16bit TIF
How it was post-processed:
> Post-processing was done in Photoshop
> Topaz Adjust on the entire image to get back the colors and the details [details]
> Topaz Denoise (on the sky and the foreground separately - more aggressively on the sky) [details]
> Saturation layer on the sky (increased master)
> Levels layer on the sky (increased brightness)
> Saturation layer on the clouds (desaturation)
> Saturation layer on the foreground (increased master)
> Levels layer on the foreground (increased contrast)
> Saturation layer on the white walls (decreased blues to remove a blue cast)
> Vignette effect using a masked fill layer [details]
> Sharpening on the foreground using the high-pass filter [details]
> Sharpening on the sky using the high-pass filter (less aggressive) [details]
> Perspective correction and cropping
______________________________________________________________________
Learn these techniques at farbspiel-photo.com - View. Learn. Connect.
- Thanks for viewing!
My image processing software seems to have a bad habit of crashing when trying to process this in 16bit :(
►►► Explore the world of HDR with me at farbspiel-photo.com - View. Learn. Connect.
______________________________________________________________________
About | HDR Cookbook | Before-and-After | Making-of | Pics to play with
______________________________________________________________________
(Hit 'f' to fave this image)
Watch the Before and After - Comparison to see where this photo comes from!
The story of this photo:
The next best thing to using The Transporter for doing your traveling through spacetime is a wormhole, as you probably all know. I think they say that using a wormhole is like taking a roller coaster ride while you are on LSD, neither of which I particularly fancy, by the way. Even better still: You never quite know where you end up, and chances are, you might get crushed by the G-forces. Well, I guess there is no such thing as a free lunch, right?
I discovered this wormhole on the AIDAbella cruise ship. After doing the meticulous wood work on the floor, there was too little time left to set up a tripod. So I took the shot handheld. As a result, this is a bit more blurry than my usual standard. After having thrown every piece of sharpening software at it that was available to me, I am still far from happy with the quality. Nevertheless, since I like the colors and the light here and since it complements my previous upload nicely, I decided to post it anyway. But don't look to closely. And if you do, please do not put me on your black-list for blurry-picture-posters. ;-)
By the way. The door at the end of this corridor takes you right here.
Enjoy!
Take a look at my "HDR Cookbook"! It contains some more information on my techniques.
How it was shot:
> Taken handheld [details]
> Three exposures (+1, -1, -3ev)
> Camera: Nikon D90
> Lens: Sigma 10-20mm F3,5 EX DC HSM
> Details can be found here
How it was (tonemapped):
> No tonemapping and no HDR here! I used the exposure fusion feature of Photomatix Pro 4.0 since it produces less noise.
> Saved as 16bit TIF
How it was post-processed:
> Post-processing was done in Photoshop
> Slight perspective correction and cropping
> Topaz Adjust on the entire image to get back the colors and the details [details]
> Topaz Denoise [details]
> Topaz Infocus to rescue a bit of sharpness
> Levels layer on the floor (more contrast)
> Curves layer on the blue parts (more contrast)
> Saturation layer on the blue parts (master)
> Saturation layer on the arches (slight desaturation)
> Levels layer on the arches (slight brightening)
> Vignette effect using a masked fill layer [details]
> Watermarking
______________________________________________________________________
Learn these techniques at farbspiel-photo.com - View. Learn. Connect.
- Thanks for viewing!
This is an image from my most recent trip to PBPW Cuba. The image you are seeing are part of a greater project, a book serries titled "Turning the Last Page." The title of the Cuba project is "Cuba: Turning the Last Page of 1962."
The camera was the fabulous Nikon D5. The lens was 28-300mm "street sweeper" lens. To make sure we are all on the same page, there are always two aspects to every shoot. "The Shoot" itself and the post processing to final art. This image contains both aspects and is the outcome of the post processing this is a copy of that final file.
For "the shoot" aspect of this project no artificial light, no make-up on the subjects, no reflectors or diffusers all of the images are spontanious none of the subjects are posed. So what you are seeing is (from the shoot aspect) just the lens. Just the camera. Just the light that was there. Just the subject
My goal every time I shoot is to be the weakest linkn the entire project.
This image of Anthony was shot whilst walking through a neighborhood on the outskirts of Havana.
When asked what is the best light W. Eugene Smith said "Why the best light is available light and by available light I mean any damn light that is available."..... This approach to lighting Works for me.
I have always held that the lens is the brush, the camera sensor is the canvas. I have also held the that the beauty of a lens is not in how well it handles focus but rather how well it handles from in focus to blur.
There is no image I cannot capture. There is no image in which my vision of the image and the beauty of moment that took me that is not enhanced by the beauty of the glass and lens design of the Nikon system.
So you want to know why I choose Nikon? Now you know.
Because of my Nikon camera- I AM: A Super Hero. Because of the Nikkor lenses I AM: A Super Hero with tack sharpnes at point of focus and beautiful Bokeh every place else in the image.
NOTE: I do indeed use Photoshop. It's true. Have been since version 1. when it fit on a single floppy disc. Most inspired piece of software ever written. I was employee number 2 of Niksoftware ( Colorefex, SilverEfex) and employee number 6 of Altamira Group (the inventor of Genuine Fractals) so yes I do also use plug-ins. So if you are viewing an image (unless otherwise noted) on my personal pages, website and sundry feeds they are all post processed if I put them up.
To be very crystal clear ALL of my images that I post on my personal web feeds are post processed.
So that this non issue is no issue these are my "FINAL" versions on my PERSONAL sites. Because it is my personal page I do reserve the right to delete comments from angry photographic charlatan internet trolls.
I always make it a point, If you read the full description of any of my images, to always list the software and hardware used to produce an image.
Nikon D5 camera,28-300mm lens. Recorded to Lexarmedia Raw conversion done in Capture NX-D. converted to a 16bit Prohoto colorspace .TIFF. Further post processing Photoshop CC 2017, Nik collection by Google, oNonesoftware ver.10.5. Wacom Cintiq 27QHD, Benq SW2700 monitor (for approval color)
© Vincent Versace 2016
#NikonAmbassador #nikonlove #D5 #128-300mm #lexar #kelbyone #photography #onOne@NikonUSA #NikonNoFilter #niksoftware #nikonUSA #Epson #wacom #xritephoto #onone #fjwestcott #fineartphotography #iamgenerationimage #iamnikon #B&H #PhotogenicbyBenQ #lexarMemory #nikonLOVE #PBPW
| Buy this photo on Getty Images |
***************************************************
Esta es una panoramica hecha con PSD fusionando 6 imagenes captadas en diferentes dias en formato RAW. En todas se uso largaexposicion y un filtro GND 0.6 + ND 0.9 B+W-Hoya. El revelado digital se realizo con Lightroom y luego en PSD procesando por canales RGB con mascaras de luminancia. La saturacion y enfoque se trabajo en modo Color Lab 16bits.
Llico Bajo es una pequeña localidad costera ubicada a unos 100 kms al oeste de la ciudad de Puerto Varas junto a la desembocadura del rio Llico. La zona costera de esta region es muy poco habitada de dificil acceso cubierta en su mayor parte por extensos bosques nativos que se descuelgan hasta el mar. Su abrupta costa esta conformada por grandes acantilados y formidables formaciones rocosas que dan espacio a pequeñas playas siempre golpeadas por los fuertes vientos provenientes del mar de gran atractivo para cualquier aficionado a la fotografia buscando nuevos escenarios y paisajes.
--------------------------------
This is a panorama made with PSD merging 6 images captured on different days in RAW format. All are long exposition use and GND 0.6 + 0.9 B + W ND-Hoya filter. The digital processing was done with Lightroom and then processed by RGB PSD masks luminance channel. The saturation and sharpening worked in 16bit mode Color Lab.
Llico Bajo is a small coastal town located about 100 kms west from the city of Puerto Varas at the mouth of the river Llico. The coastal area of this region is very low populated mostly difficult to reach covered by extensive native forests that hook to the sea. Its rugged coastline is formed by high cliffs and stunning rock formations that give space to small beaches always struck by the strong winds from the sea a great attraction for any photography enthusiast looking for new sceneries.
Horseshoe bay in Bermuda.
hope everyone had a nice weekend .. HAPPY MONDAY BLUES!!!
Camera: Nikon D700
Exposure: 0.25 sec (1/4)
Aperture: f/11.0
Focal Length: 30 mm
ISO Speed: 200
Crop: True
Tripod: Yes
Filter: Lee Soft Natural Density graduated filters .3
Software: Adobe Photoshop CS4 Windows (raw edit @ 16 bit)
1 exposure shot at 14bit NEF file, opened and edited in CS4 raw as a single shot at 16bit sRGB for a less destructive edit.. not HDR processed
Woke up early and I was at the sea at about 5 o'clock in the morning, I saw some clouds on the horizon and I knew that the rising sun would make them glow :)
Nikon D800 set on manual , on 055 manfrotto ballhead , Nikon 16-35mm F/4 @ F:8 , right angle finder, 60 seconds , ISO 200 , single Neff 16bit , prophoto color space.
opened in Camera Raw for distortion correction and white balance , PS6 for cropping , details and minor spot removal.
saved for web as an sRGB jpeg.
No fancy photoshop stuff , just additional distortion correction , horizon leveling and some sharpening.
Thank you for viewing and commenting !
►►► Explore the world of HDR with me at farbspiel-photo.com - View. Learn. Connect.
______________________________________________________________________
About | HDR Cookbook | Before-and-After | Making-of | Pics to play with
______________________________________________________________________
(Hit 'f' to fave this image)
The story of this photo:
This is another shot from my Edinburgh trip. The castle is the most visible feature in the "skyline" of Edinburgh. It is sitting atop the volcanic "Castle Rock". This place was the centre of many historic events for the last 800 years. Unfortunately, my time was rather limited, so I did not get to go inside the castle. There is a very nice park at the foot of the Castle Rock. The green of this park actually dominates this shot but I like the complete skyline of the castle that comes out nicely from this spot. It also shows how that castle dominates Edinburgh.
Take a look at my "HDR Cookbook"! It contains some more information on my techniques.
Success story:
This photo is featured on the cover of the book 'Belief in Ourselves' by Neil M. Gunn (published by Whittles Publishing). This is a book that you should really have in your bookshelf! :-)
How it was shot:
> Handheld
> Three exposures (0, -2, +2 ev) autobracketed and merged to get and HDR
> Camera: Nikon D90
> Lens: Nikon AF-S DX Nikkor 18-200mm 1:3,5-5,6G ED VR
> Details can be found here
How it was tonemapped:
> Photomatix version 3.1 (Detail Enhancer)
> Saved as 16bit TIF
How it was post-processed:
> Post-processing was done in Photoshop
> Perspective correction and cropping
> Topaz Adjust on the foreground (everything except the sky) to enhance the details and the colors [details]
> Topaz Adjust on the sky with more extreme settings to enhance the dramatic look
> Topaz Denoise in the foreground and the sky with different settings [details]
> Saturation layer on the sky
> Curves layer on the foreground to enhance the contrast and brightness
> Curves and saturation layers on the castle to tune the colors and contrast
> Photo filter layer (warming) on the castle to bring back the warm tones lost in the other color corrections
> Global levels and saturation layers for fine-tuning colors and contrast
> Vignette effect added on a separate layer [details]
> Sharpening using the high-pass filter [details]
______________________________________________________________________
Learn these techniques at farbspiel-photo.com - View. Learn. Connect.
- Thanks for viewing!
░ Porto Alegre / RS - Shopping Praia de Belas
▒ Pentax *ist D - Sigma Super-Wide 1:2.8 24mm
▓ f/2.8 - 1/25 - ISO 400 - 24mm
► See where this picture was taken. [?]
Meu novo mascote brincando nas pimentas da decoração do Shopping Praia de Belas.
Valeu markos pela ajuda na produção hehehe :D
┌ 1st on interesting photos tagged with "Toad Mario"
├ 2nd on interesting photos tagged with "Super Mario Bros"
└ 3rd on interesting photos tagged with "Mario Bros"
These are the metallurgist tools laying under his project. A plane that he has been restoring for 6 years.
Please leave a comment if you like this photo. If you have any questions about a photo or about photography in general, just post it or send me a Flickr mail and i will respond as quickly as possible.
The main hall of Chehel Sotun is a three dome structure, with each dome being flanked by a vaulted arch on either side, to give a total of six vaults. Each vault is filled with a large scale fresco painted on ceramic with the detail of a Persian miniature as used until then only in book illustrations. The decoration and the frescoes of the main hall were finished in 1647, under the auspices of Shah Abbas II to record key events in the Safavid dynasty
The renowned frescoes overpower the beautiful decoration of the domes and the vault surroundings. The decoration is in the Safavid style, similar to that found in the mosques, but instead of blues and yellows the dominant colour here is a warm gold. The richness of colour contributes to the overwhelming experience. The impact of the frescoes is due in a large part due to the very decorations that they are embedded into, and as such form an integral part of.
The internal roof is all the more breathtaking considering this palace was badly damaged when Esfahan was occupied by the Afghans from 1721-1729, who covered the frescoes with thick white paint. The remarkable recovery is being carried out by the Instituto Italiano per Il Medio Oriente. It seems only the dome frescoes are beyond repair, which makes the well preserved dome fresco on the open air rear terrace all the more precious.
The eastern side (shown here on the lower half) shows three frescoes, from left to right:
- Shah Abbas II's party for Nader Mohammad Khan, Emir of Turkistan
- Shah Ismail I's battle in India
- Shah Ismail I's Battle of Taher-Abad against Sheibak Khan the Uzbek
The western side (shown here on the top half) also shows three frescoes, from right to left:
- Shah Tahmasp receiving the Hindu prince Humayun
- Shah Ismail I's Battle of Chaldoran against the Ottoman Turks
- Shah Abbas I's feast in honor of Vali Mohammad Khan, Emir of Turkestan
The lower walls that support the domed and vaulted roof feature an additional twenty small frescoes, placed between the doors, niches and windows. These are conventional frescoes painted on plaster, and somewhat dominated by the six large frescoes in the ceiling vaults. While they have survived less well, they depict daily life at the Safavid court in exquisite detail.
note: There are "Click for detail" links attached to notes over each individual fresco, that load the separate photo of the relative fresco, including the smaller frescoes along the lower walls.
On our first trip to Iran, I took so many photos inside the main hall that upon reviewing the photos, I realised there were enough photos to create this composite image of the entire ceiling, excluding the lower walls. The shadows from the side windows have been reduced, but not removed to retain a sense of depth. The individual photos had to be manipulated considerably to 'flatten' the complex form of the ceiling and join the pieces together - a process which by nature introduces distortions in spatial form as well as technically compromising the resolution of some sections more than others, depending on the level of correction. In addition, with the inevitable 'flip and copy' sections, this image is not 100% accurate.
For over a year, while this image accumulated some 3,000 views, there were dark black shadows where the detail of the lower walls was missing.
On our second trip to Iran I systematically photographed the lower walls, taking first a series of photos of both walls to create a stitched panorama image of each wall, as well as taking individual photos of each of the small frescoes, which were post processed as individual shots (each also individually uploaded to flickr from the individual shots) and then reduced into the wall 'panoramas'. The two composite wall 'panoramas' were subsequently added to the top and bottom of the composite roof image. Finally the combined 'roof and walls composite' was re-equalised to match the roof and the walls, as well as enhancing colour and contrast from the earlier 'roof only' versions.
Unfortunately not a single shot of the small fresco on the right beside the eastern main entrance came out sharp enough, so for time being, there is no large version available of that particular fresco, and accordingly, there is no 'Click for detail' link on this composite.
Instead of uploading the complete version as a new image, I chose to replace this previously incomplete image.
The complete composite measures 10400 x 14941 at 133Mb in JPEG (in PSD it's 2GB and that's in 8bit after the 16bit version ran out of memory...). This scaled down version measures 'only' 2048x1534 at 4Mb. The six main frescoes linked from this page are crops from the high resolution PSD original, while the smaller frescoes from the lower walls are linked to the original size photos, which appear in reduced size on this composite.
The EXIF data originates from a photo from the lower part of the 'Battle in India' fresco, but all photos were taken with identical exposure etc. During both trips to Iran I was still shooting with the Nikon D200, so the Sigma 30mm f1.4 was the perfect lens given its equivalent to the classic normal prime on an APS-C sensor. The hall is remarkably dark, and no flash is allowed. The crowdy environment means setting up a tripod is simply not an option. The Sigma f1.4 allowed the low noise ISO400 to be used while still achieving a speed of 1/45 sec - just fast enough to get a sharp handheld picture...
I am attempting to create similar composites of Vank Cathedral, and the Apadana Stairs...
* This photo is blogged here by 'IntelliBriefs'
* This photo is used by Columbia University
* 26 July '07 - #286 on Flickr's Explore.
An Axelay-based MOC. I took the Axelay from the game and from some art I found on DeviantArt and kind of smushed them together, and then threw in a dash of my own boilerplate.
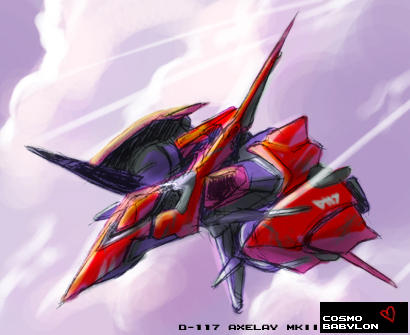
It came out alright, I think.
More here when it moderates.
From my most recent trip to Cuba. Landscapes
Captured with the AMAZING Nikon Z7 (modified to shoot infrared by Lifepixel) with the FTZ adapter and the 24-120mm Nano coated Nikkor lens.
A 45mp 12 IMAGE INFRARED HAND HELD PANO OF THE VINALES VALLEY?!?!?!
What do I have a digital deathwish? I am surprised I did not pass by my birthday doing the post processing on this. 85 inches x13 inches at 360ppi 16bit. OR 36gb of PSD. Whoa
#Nikon100 #nikonlove #lexar #kelbyone #infrared #photography#onOne @NikonUSA #mirrorless #Nikonz7 #105mm #cuba #ballet #PBPW #NikonNoFilter #niksoftware#nikonUSA #Epson #wacom #xritephoto #onone #sunbounce#fineartphotography #DxO #iamgenerationimage #iamnikon #B&H #PhotogenicbyBenQ #lexarMemory #lifepixel.com #nikonLOVE @lexarmemory elite photographer #lexarmemory #nikonnofilter