Legend of The Winter Soldier
View allAll Photos Tagged image_masking,
Since the assignment was "over processing" this caused me to really think about a special image that I could experiment with. I usually don't fool with too much processing, even though I find it fun and creative. I wanted Mohave's sweet face to stand out against the snow so I desaturated most everything in the image, masking his face. This was a cell phone shot so I used Topaz to whiten the image overall and intentionally smoothed out most details. Now that it is finished, I can't decide if the original shot is better. Oh well....Happy Smile on Saturday!
Oriental Mystic Venice by Daniel Arrhakis (2018)
With the music : Phil Rey Gibbons - Heavenly (feat. Felicia Farerre)
Work made with several images of mine, stock images, masks and sculptures. Art collage, digital painting, color saturation techniques and digital painting processes.
________________________________________________
Thank you for your nice visit, comments and invitations dear friends ! A wonderful final of the week and weekend !
I will be more in challenges and groups during these days, my best regards to all of you ! : )
Editing this image is a story in itself. This photo was taken on an iPhone using the Live mode. In that mode, you have to hold the phone still for about a 3 second video capture, which can then be used to select the best single image or to create blur in moving subjects, among other choices. I saved both the blurred image and the single photo image. Unfortunately, when the blurred image is saved, sharpness is poor outside the moving water and the image is cropped significantly. Here, I was able to layer the blurred image on top of the single image, masking only the moving water. I had to resize the blurred layer carefully to fit the uncropped single image, and move it slightly for alignment, but the result came out fairly nice.
In camera double exposure. Any blown highlights effectively become an image mask.
How to Guide: www.reddit.com/r/postprocessing/comments/xfqxe/double_exp...
Woca 120GF with Foma 400 film.
Camera made by Holga features a glass lens. Comes with 4.5 X 6 image mask.
.
For Sliders Sunday.
I'd shot this a little wide so I could crop to the composition I wanted, with the A on a third and the wall it's on occupying two-thirds of frame. Then in Lr and Ps used sliders to warm up that wall, enhance the texturing a bit with Clarity, and cool down the right side. I most likely used in Lr, the black slider and white slider of the basic exposure module to enhance contrast. I think I used a gradient in Lr to so that I could boost saturation a little on just the right side, especially of blue. I might have also used the high pass filter in Ps on the warm side of the image, masking out all but the shaded part to again enhance texture. And I think I either used the adjustment brush in Lr and the exposure slider or created a dodge/burn layer in Ps to paint in burning of some of the shadows for greater contrast. I had played with this one a couple weeks ago so I'm not sure about everything I'd done. But I thought it'd be a good one for Sliders Sunday. Original in first comment box below. If it doesn't show, hit refresh a time or two. That worked for me at others' photos today.
HSS everyone!
"Fire and Ice"
Shooting through holes in icebergs that had floated onto the beach deep in the fjord lands of Chilean Patagonia!
tis october, ai image
Masks at Halloween were initially worn to ward off evil spirits.
People believed that at Halloween, souls would come back to walk the earth, looking for lives to take with them.
So the theory was that if you wore a scary mask, you would scare off the evil spirits. I may have been an exception.
Zaanse Schans, Zaandam, Noord-Holland, Nederlands
Starting in 1961, historic buildings, windmills, barns and houses from across the Dutch Zaan region were brought to Zaanse Schans in pieces and reassembled. The town is now a very popular tourist destination to view 18th and 19th century Dutch life.
Windmills (shot March, 1976):
Hexanon AR 50mm f/1.7
Kodachrome 64
Scan: Nikon Super Coolscan 8000 ED, VueScan
Sky (Shot June, 2003):
Nikon F100
AF-Nikkor 80-200mm f/2.8D ED
Kodachrome 25
Scan: Nikon Super Coolscan 8000 ED, VueScan
Processing: Two different 3625 x 5436 vertical images of the same windmill silhouette arranged to make a horizontal 7250 x 5436 image), masking to add the sunset scan with a Wacom Intuos Pro tablet.
Check out my Kodachrome album
Découvrez mon album Kodachrome
Check out my Travel Photography album.
Découvrez mon album Photographie de Voyage
► All my images are my own real photography, not fake AI fraudography.
► Toutes mes images sont ma propre vraie photographie, pas une fausse fraudographie basée sur l'IA.
■ Please don't use my images for any purpose, including on websites or blogs, without my explicit permission.
■ S.V.P ne pas utiliser cette photo sur un site web, blog ou tout autre média sans ma permission explicite.
© Tom Freda / All rights reserved - Tous droits réservés
Object: Cirrus Nebula NGC6992.
Optic: CA300 (300/1200mm Newton f4), GPU Corrector.
Mount: Skywatcher EQ8.
Camera: ZWO ASI 183MM-C @ -20°C, Gain=53 (RGB), Gain=200 (Ha, OIII), Offset=10.
Filter: ZWO EFW 7x36mm, Baader 36mm Filter.
Exposure: total 14.3h , Ha 40x4m, OIII 60x4m, R 37x4m, G 36x4m, B 41x4m.
183xBias, 51x Darks, 31-41x Flats per channel.
Color: Ha-OII-RGB (not for all versions).
Date1/Location1: 2018-10-05, Zirndorf.
Date2/Location2: 2018-10-09, Zirndorf .
Date3/Location3: 2018-10-10, Zirndorf.
Date4/Location4: 2018-10-12, Zirndorf.
.
Capture: INDI Lib, INDI Starter, CCDCiel (Sequencing, Autofocus, Dithering, AutomaticFlat).
Guiding: TS-OAG 9mm, ASI120MM, PHD2.
.
Image Processing:.
PI:.
BatchPreprocessingScript, Blink, CosmeticCorrection, ImageIntegration, ChannelCombination, DBE,.
HistogramTransformation, MaskedStretch, PhotometricColorCorrection.
.
Starnet from Nikita Misiura:.
Starless Image, Mask.
.
Startools:.
Magic.
.
PS:.
Levels, lightenLayer of red colored Ha-Channel, lightenLayer of a blue colored OIII-Channel, .
Curves, ColorBalance, Dynamic, Blend of a starshrinked Image, maskedMinimumFilter,.
Curves, Dynamic
In camera double exposure. Any blown highlights effectively become an image mask.
How to Guide: www.reddit.com/r/postprocessing/comments/xfqxe/double_exp...
Object: Cirrus Nebula NGC6992.
Optic: CA300 (300/1200mm Newton f4), GPU Corrector.
Mount: Skywatcher EQ8.
Camera: ZWO ASI 183MM-C @ -20°C, Gain=53 (RGB), Gain=200 (Ha, OIII), Offset=10.
Filter: ZWO EFW 7x36mm, Baader 36mm Filter.
Exposure: total 14.3h , Ha 40x4m, OIII 60x4m, R 37x4m, G 36x4m, B 41x4m.
183xBias, 51x Darks, 31-41x Flats per channel.
Color: Ha-OII-RGB (not for all versions).
Date1/Location1: 2018-10-05, Zirndorf.
Date2/Location2: 2018-10-09, Zirndorf .
Date3/Location3: 2018-10-10, Zirndorf.
Date4/Location4: 2018-10-12, Zirndorf.
.
Capture: INDI Lib, INDI Starter, CCDCiel (Sequencing, Autofocus, Dithering, AutomaticFlat).
Guiding: TS-OAG 9mm, ASI120MM, PHD2.
.
Image Processing:.
PI:.
BatchPreprocessingScript, Blink, CosmeticCorrection, ImageIntegration, ChannelCombination, DBE,.
HistogramTransformation, MaskedStretch, PhotometricColorCorrection.
.
Starnet from Nikita Misiura:.
Starless Image, Mask.
.
Startools:.
Magic.
.
PS:.
.
Real Color Version:.
Debra Ceravolo's Narrowband Color technique using Gradient Map's, ColorBalance, Dynamic,.
Blend of a starshrinked Image, maskedMinimumFilter,.
Curves, Dynamic
You can find other pictures at www.dzphotography.it
Puoi trovare altre immagini su www.dzphotography.it
*********** Please press L or left-click to view on black ***********
You can find other pictures at www.dzphotography.it
Puoi trovare altre immagini su www.dzphotography.it
*********** Please press L or left-click to view on black ***********
You can find other pictures at www.dzphotography.it
Puoi trovare altre immagini su www.dzphotography.it
*********** Please press L or left-click to view on black ***********
16 Image Mask Set for the Rolleiflex T and the Rolleimagic.
Produced between 1958 (1960 onwards with Rolleimagic mask) and 1978.
With this set it is possible to shoot smaller images with the T and Magic.
1) Case.
2) 4x5,5 cm Mask for the Filmgate.
3) 4x4 cm Mask for the Viewfinder Screen.
4) 4x4 cm Mask for the Sports finder.
5) 4x5,5 cm Mask for the Rollei Magic Viewfinder Screen.
6) 4x5,5 cm Mask for the Viewfinder Screen.
7) 4x5,5 cm Mask for the Sports finder.
Normally these TLR's can get 12 images 6x6 cm on a 120 type rollfilm. With this set they can get 16 images on that same type of film.
Note that even when using the 4x4 cm Viewfinder Mask you still will get a 4x5,5 cm size image as there is no 4x4 cm Filmgate Mask in this set.
I found this photograph among my grandmother's stash of pictures after she died. The caption was what she wrote on the back; apparently, these were guests at a Halloween party she attended sometime in the 1940s or 1950s. There is a calendar on the wall in the background, but I am unable to make out a date. It's hard to imagine going to a costume party and seeing people in blackface (they are actually wearing masks, but same concept)--definitely an image from a different era!
(Colour version of the previous image)
Mask: Oxumarê, depicting the God of transformation Yorubá with the sacred Python.
Hand-carved in wood, polychrome-painted and mounted with natural seashells.
Artist: Sandro Lumumba.
Size: approx. 40cm. x 25cm.
Pricetag: USD$250 or 180 Euros + freight. (in support of CARF's work in Brazil)
I had a few goals with this design:
1. Reduce the size of photos so they’re still big and nice but they don’t cannibalize the rest of the content. The past two designs made the photos bigger and bigger and a paragraph of text next to one looked ridiculous. Besides, if you really want to see my photos huge, you can always click over to Flickr.
2. Get away from Helvetica. I spend all day developing and designing iOS apps which means I see Helvetica 23.5 hours a day. I dream in Helvetica. I wanted a little break. Granted, I chose two fonts that are heavily overused (Proxima Nova and FF Tisa Web Pro), but I really enjoy them so that’s where we’re at.
3. Never open Photoshop, only use a single image for that smiling photo of me up top. And make that image mask scalable (thanks, SVG). Any other imagery is done with web fonts. Start and finish the project in 48 hours or less. It ended up being 51 hours from start to finish, but I’m okay with that.
16 Image Mask Set for the Rolleiflex T and the Rolleimagic.
Top photo :
Without the 4x5,5 cm Mask the sense lever (see green arrow) is not depressed and the filmcounter window shows a white 12 (images) flag.
Bottom photo :
When the 4x5,5 cm Mask (see red arrow) is inserted the sense lever (see green arrow) is depressed by it and switches the filmcounter and its window flag to 16 (images).
This automatic switching over of the film counter mode is of course a very handy feature.
© All rights reserved iDJ Photography 2012 idjphotography.com/
Twitter: twitter.com/idjphotography
Facebook: facebook.com/idjphotos
16 Image Mask Set for the Rolleiflex T and the Rolleimagic.
Also the Sports (Frame) finder can be adapted to size with a Mask.
Here shown with the 4x5,5 cm Mask (see red arrow) clicked onto the Hood.
Clipping Path Saffron (CPS) is an internet based outsourcing graphic studio providing clipping path service,multi clipping path service,image masking, background removal,drop shadow, retouching,neck joint, raster to vector, image manipulation and other Photoshop services at realistic price within short turnaround time.
Repeatedly dropped Belair X 6-12 City Slicker + abused Kodak Portra 400 + 58mm f/8 + 6 x 9 image mask + TSA X-ray exposure
I started my California trip by working from Santa Rosa. The first day was so beautiful I headed up into the hills right after work, skipping dinner, and chanced upon this little county, or community, park. It was a great, small locale to test out the new 10-20 mm lens.
This is a non-HDR, 2 exposure blended image. I combined 1 sky-exposed and 1 grass-exposed image, masking out the darkened grass on the sky-exposed image to act as a neutral-density filter would. This was a must, as when I travel for work I cannot take all my photo equipment, and unfortunately the graduated filters had to stay home.
photoshop; photo retouching; retouch; photoshop editing; photography; background removal; adobe photoshop; photoshop work; amazon listing; color correction; photoshop editing; photo manipulation; amazon product photo; photoediting; background remove; image editing; amazon; remove background; retouching; image resizing; photo edit; amazon photo editing; background removal; image resize; ebay; cut out; online shop; photoshop image editing; resizing images; fashion; amazon store; resizing; jewelry edit; photo manipulation; crop; remove background; resize image; fashion; photoediting; resizing; transparent; photo manipulation; amazon; photoshop; white background; retouch photo; changing background; product retouch; ecommerce product; photoshopping; photoshop work; clipping; product editing; photoshop work; photo editing; photo manipulation; amazon infographic; cut out; amazon editing; cut out images; photoshop retouch; cut out background; photo fixing; resizing; e commerce; photo resize; resizing images; resize; image processing; nick add; image masking
Clipping Path Saffron (CPS) is an internet based outsourcing graphic studio providing clipping path service,multi clipping path service,image masking, background removal,drop shadow, retouching,neck joint, raster to vector, image manipulation and other Photoshop services at realistic price within short turnaround time.
i highly doubt any of these frames will make it past the cutting room. but i scanned this as a positive (even though i cross processed it into C-41). and i kinda liked the results.
only a couple more images to work on from my roll... my first experiments here with overlaying images and using photoshop image masks certainly will motivate me to try some more!
cheers.
--------------------
My photography blog has yummy ice cream you can download!
---------------------
If you’d like to view my images larger… While I only allow my contacts to view my larger images (I generally upload at least 800px images on the long axis)…
a quick workaround I might suggest is to view my photostream as a slideshow. Works well for me. This is frequently how I view others’ ‘streams, and it will put a large image on black. just click the projector screen icon next to the stream or set. : )
---------------------------
on 01 jan 2010, I began a new journey w/ a flickr 365 group that i formed. The idea is that I strive to push myself daily; by exploring techniques, ideas, and experiments.
-----------------------------
This instrument is themed after Alphonse Mucha’s cover for the magazine “La Plume,” #241, March 1899. “La Plume” was an important magazine, dedicated to literature, art, and Parisian society. Its cover with a young woman standing with arms outstretched and holding a giant feathered writing quill became an icon of the period. It exemplified Mucha’s ideals about bringing aesthetic values into crafts.
Photo credit: Nicholas Alan Cope
For promotional use only. Unauthorized use is prohibited.
For more information, please contact the Museum of Making Music at (760) 438-5996, ext. 170.
NOTE TO EDITOR: High-resolution photo includes image mask & outlines. Contact B.J. Morgan for artwork.
Star cluster within the Orion Nebula M42, When imaging this vast nebula complex this area is typically greatly overexposed in an effort to capture the faint regions. This image was created using stacked and merged LRGB and image masks of varying exposures.
For more see
www.youtube.com/watch?v=Xd8KPzJP0_U&ebc=ANyPxKo0vZ4Jd...
Also, for more open star cluster images click on MORE on album list page, click Galleries, click DSO images gallery.
* Remove Background / Background Removal
* Clipping Path / Cut out Images / Object Remove
* White Off or White Background / PNG Transparent Background
* Image Masking / Hair Masking
* Drop shadow / Natural shadow / Reflection Shadow
* Product Retouching
* Jewelry Retouching
* Color Correction
* Photo Retouching
* Image Re-size
This BJD artwork "Ruo Meng" is about animals.
The visual appearance of animals is only an image (Mask) we perceive with our eyes.
Beneath the Mask, they have souls as we do, too.
We are far from love and peace if unconscious discriminations still exist.
Ruo Meng
1st handmade artdoll
[SOLD]
www.clippingpathhouse.com provide clipping path service, background removal, image masking, ghost mannequin and all kind of photoshop image editing service with affordable price.
photoshop; photo retouching; retouch; photoshop editing; photography; background removal; adobe photoshop; photoshop work; amazon listing; color correction; photoshop editing; photo manipulation; amazon product photo; photoediting; background remove; image editing; amazon; remove background; retouching; image resizing; photo edit; amazon photo editing; background removal; image resize; ebay; cut out; online shop; photoshop image editing; resizing images; fashion; amazon store; resizing; jewelry edit; photo manipulation; crop; remove background; resize image; fashion; photoediting; resizing; transparent; photo manipulation; amazon; photoshop; white background; retouch photo; changing background; product retouch; ecommerce product; photoshopping; photoshop work; clipping; product editing; photoshop work; photo editing; photo manipulation; amazon infographic; cut out; amazon editing; cut out images; photoshop retouch; cut out background; photo fixing; resizing; e commerce; photo resize; resizing images; resize; image processing; nick add; image masking
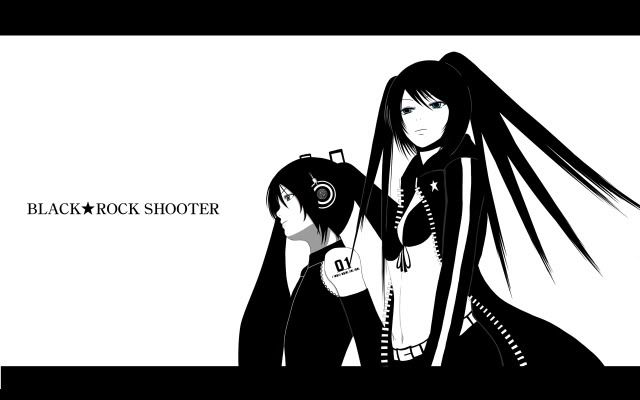
Design Name: BLACK ROCK SHOOTER - ramune re-edit
Purpose: New repeating background for YouTube page
Approx. Perfectionist Timespan: 8-10hrs.
Software: Photoshop CS3
Hardware: Mac Mini (KIHARU)
Inspiration: Love for BLACK ROCK SHOOTER and the song
New techniques done:
+ Doing a Dropshadow gradient effect w/o using Drop Shadow
+ Using a watermark text style as typesetting
+ Satin effect to create effect of shining light w/ shadows cast on their skin
+ Altering RGB Levels on image mask to create a colored outline
Epiphanies:
+ Working with vector images can be difficult to work with if done wrong.
+ Finally understand how to make repeating backgrounds - keep the edges simple.
Foolhearty Sacrifices: Lack of sleep
Original source art: img.photobucket.com/albums/v195/Alexiel-sama/brs_miku_vec...