Raspberry Pi
September 13 2014 Palatine Library Blackpool
Mame RetroPie Raspberry Pi
tkkrlab.nl/wiki/Arcade_RetroPie
www.suppertime.co.uk/blogmywiki/2014/02/noobs/
Raspberry Jamboree 2014
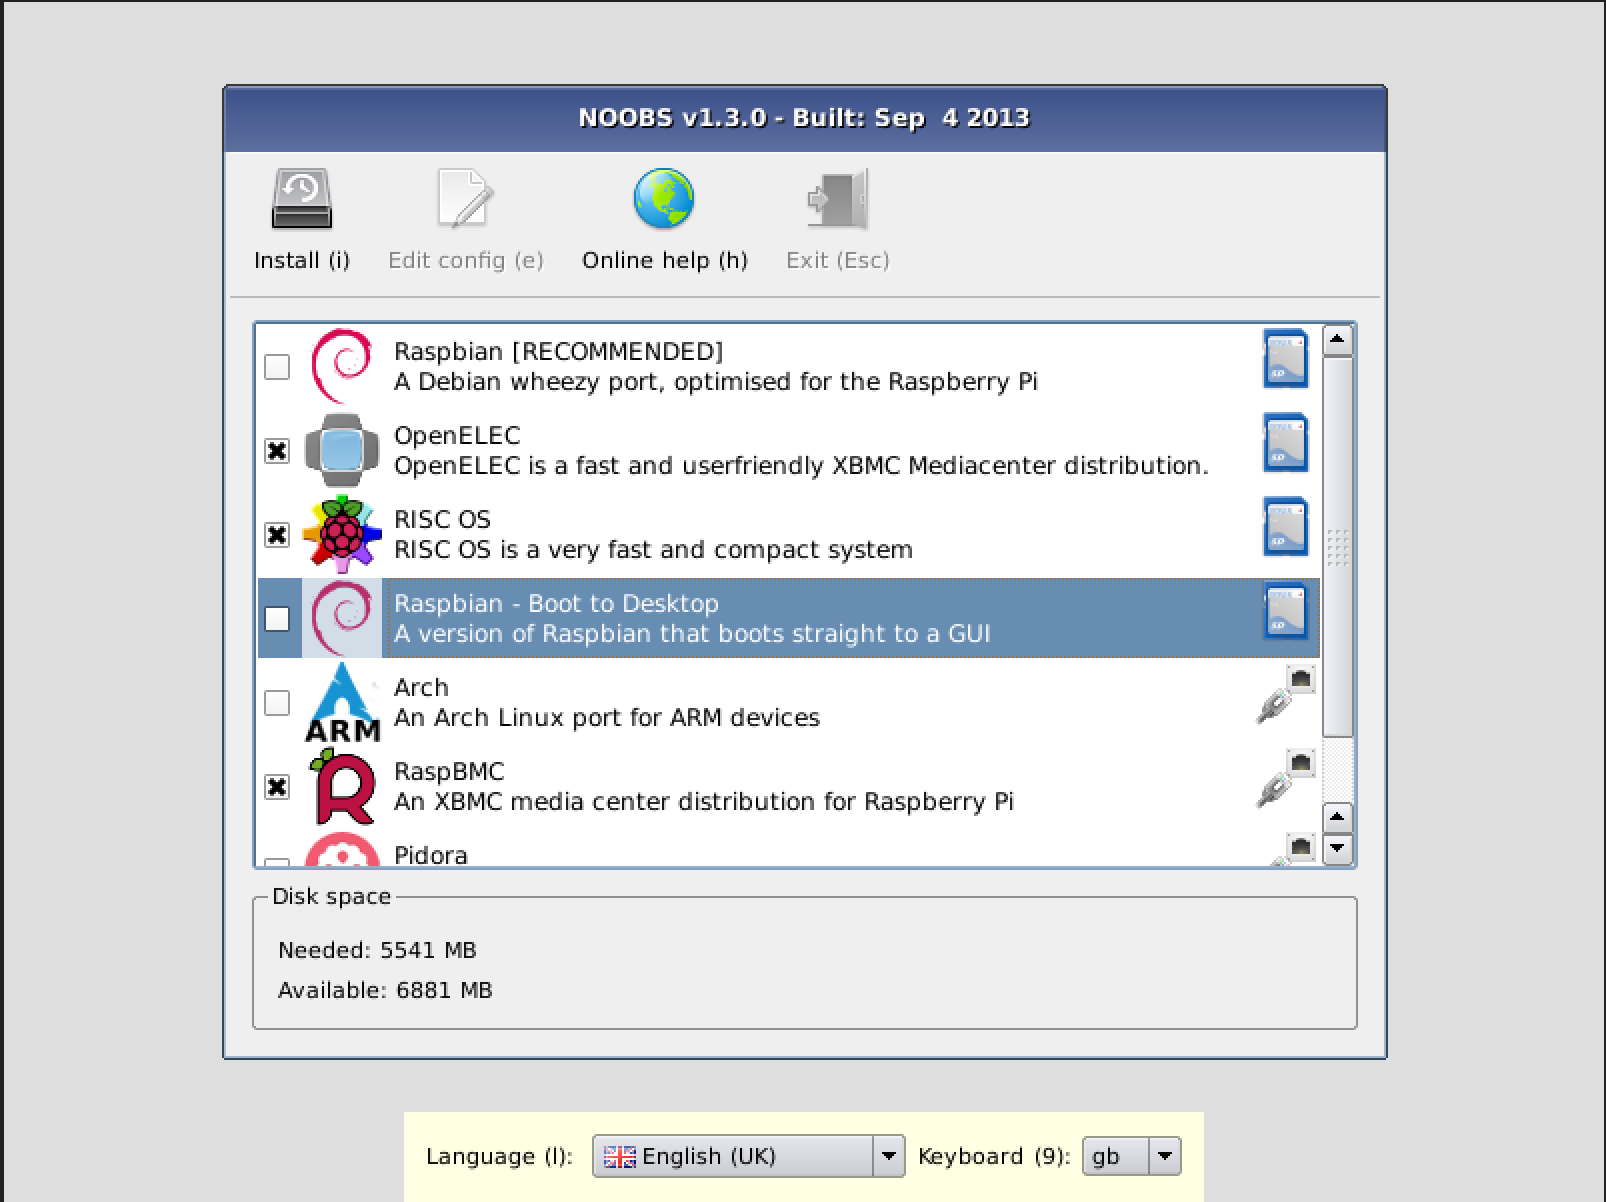
I've been setting up Raspberry Pis since they came out, and they have worked so hard on making it easier to set up. The NOOBS software is fantastic.
Temperature: -3ºC
Src: www.raspberrypi.org/wp-content/uploads/2013/09/os_selecte...
Raspberry Pi 2 ケース
2015年2月2日 Raspberry Pi 2 発売。
ということでさっそく購入しました。
Tokina 4mm f1.2 CS-mount : Channel Swap 590nm to 665nm
Cheick Omar, Lead local jokkolabs Ouaga présente le RaspberryPi
Available at Adafruit!
See Also: rasterweb.net/raster/2015/06/05/a-life-time-of-yeahs/
Lego brick Case
marking out the template #catchthemagic #raspberrypi #scratchgpio #swmakers #watchoutsanta
youtu.be/oTkp4THXHew
Raspberry Pi Zero 2 W is here! We did a 2am video and more :) AND! Sign up now to get it immediately once it arrives!
adafruit.com/piz2w
RasPi + 4"LCD + NOIR = 2.5h~2.8h
Rapsberry pi octoprint tutorial
My first Raspberry Pi!