
MOSTAFA HAMAD | PHOTOGRAPHY
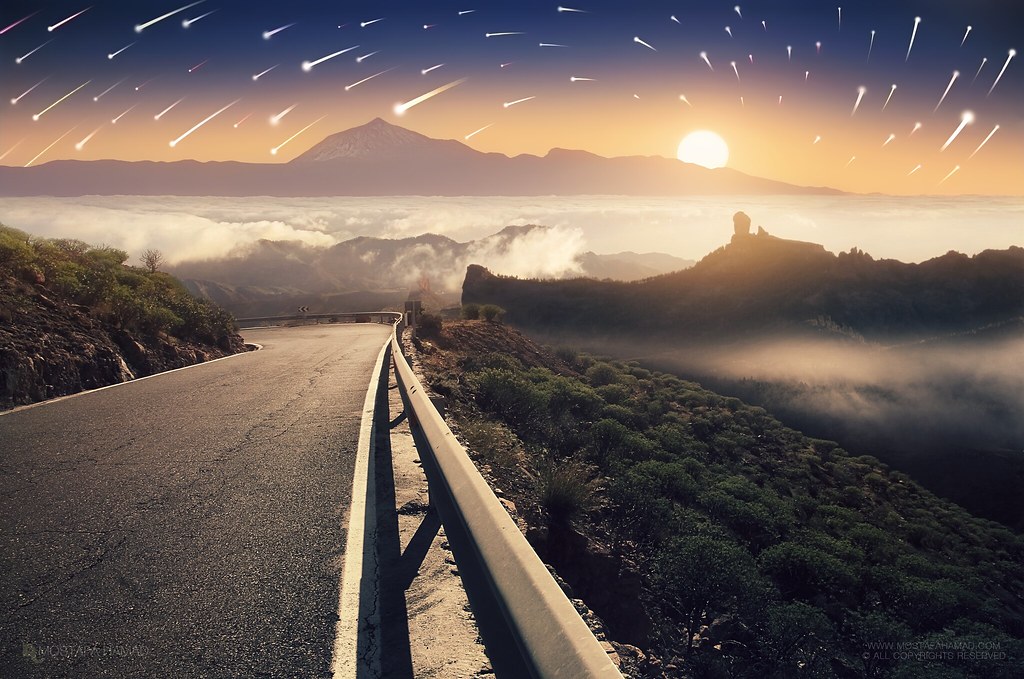
A way to the Stars
I still remember the details of that quiet way that leads to the summit and how it was changing according to the nature of the place, from farms on the slopes of the mountains until penetration among the clouds at an altitude of more than 2,000 meters above sea level where the scene acquired more beauty.. The clouds got more thickens and created the most beautiful paintings of nature while it was hugging the mountains
---------------------------------------------------------
مازلت أتذكر تفاصيل ذلك الطريق الهادئ المؤدي الى القمة وكيف كان يتغير مع طبيعة المكان بدءا بالمزارع على منحدرات الجبال حتى تغلغله بين الغيوم على ارتفاع اكثر من 2000 متر فوق سطح البحر حيث يكتسب المشهد جمالية اخرى تماماً فالغيوم تتكاثف وتمتد لترسم اجمل لوحات الطبيعة وهي تعانق الجبال.
How to make the stars:
Equipment
1.Camera with a wide angel lens
2.Remote control to avoid the vibration (You can use the camera timer in case you do not have Remote control)
3.Solid tripod to avoid vibration
4.Motorized remote follow focus and zoom system
5.Programs: Photoshop and Starstax
6.And a lot of time and patience
The Shooting
1.Number of images: approximately 150
2.Shutter speed, Aperture and ISO: Part of the images with Manual Mode (30s | F/4.0 | 3200). The other part with Bulb Mode (45s | F/8.0-10 | 3200).
3.SingIe Shoots: I prefer to take a picture of the scene by the smallest Aperture possible to obtain high accuracy of the scene
4.Zoom-in/out: During the imaging process, I do zoom-in until the last possible focal length and then Zoom out to get the undulating motion of stars. Preferably to do this process toward the North Star to avoid the process of integrating more than a picture. But it’s also possible not toward the North Star. By the way, this process is not easy and it will be need a motorized remote follow focus and zoom system (Cost is a bit high).
The Editing
1.Merge the images with the Starstax by adding all images in the “inputs images” section and click above “Start progressing”. Or you can use the Photoshop for merging, add all images as layers by clicking on File>Scripts>Load Files into stacks .. then change the blending mode of all images to Lighten
2.For movement resembling the fall of comets: I use the Starstax and add all images and “Start progressing”. Then Preferences window and chose Blending mode “Gap Filling”.. check the Comet Mode and make it a little bit Short Trails.
3.After that I take the final stars images to the Photoshop to do some changes: Add Hue/saturation to give the color of the stars more Aesthetic. Add Levels to hide some Stars. The end is the brightest Star + blured brightest Star + white points.
I will soon create a video for each process from start to finish. And I will work all the experiments, both with the motorized remote follow focus and zoom system or without and search for the cheapest solution. I can’t appreciate exactly when I do the video, because I’m at the time very busy with most important things as photography. But please follow me on Facebook from here to watch the video when I published it.
Mostafa Hamad
مصطفى حمد
Camera:Canon EOS 7D
FOLLOW ME ON